
Overview: Why Use an IA Slip?
Inventory Adjustment Slips provide a controlled, auditable method for updating on-hand inventory levels. Use IA Slips for new stock arrivals (Take-On), corrections, or reconciliations as required.
Adding Items with an IA Slip
Preparation
- Determine the inventory type you are adding (Product, Recipe, or Raw Material).
- Gather your Lot Number and quantity information for accurate records.
Warning: The Lot Number field in FlexiBake is limited to a maximum of 20 characters. Lot Numbers longer than 20 characters will produce system errors and fail to save.
Add Inventory via the IA Slip
Step 1
Open FlexiBake and go to the Inventory Centre.
Step 2
Click the New IA Slip button.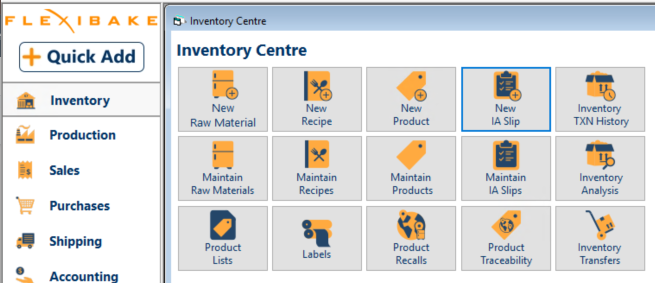
Step 3
Ensure the Take-On Radial is selected, then Choose the Type of inventory from the drop-down (Product, Recipe, or Raw Material).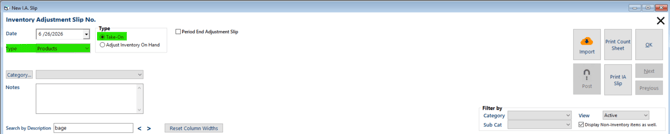
Step 4
(Optional) Select the Category for the Inventory Adjustment. This will be used to represent a type of slip and is entirely optional.
Step 5
(If applicable - Multiple Warehouses) Select the Location (facility/warehouse) where you are adding inventory, this is important to ensure the items will populate in the correct warehouse or production facility.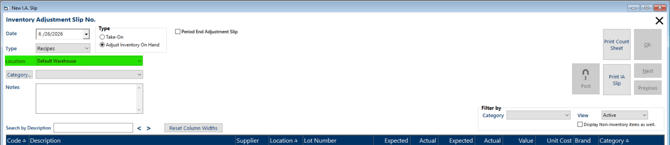
Step 6
Enter your Lot Number and Actual quantity in the appropriate fields. Remember: keep Lot Numbers at 20 characters or fewer.
Tip: Leaving the Lot Number blank when posting an Inventory Take-On will automatically date-code items with the date, slip# and item#. IE: A06262026-593.1
Step 7
Click OK to save the IA slip.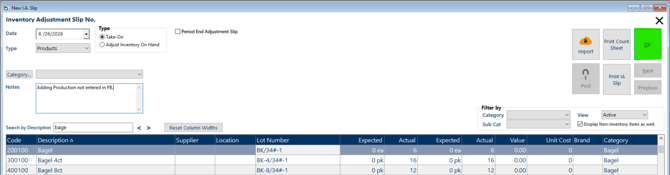
Step 8
Finalize the process by clicking the Post button. This updates your live inventory with the new/adjusted on-hand quantity.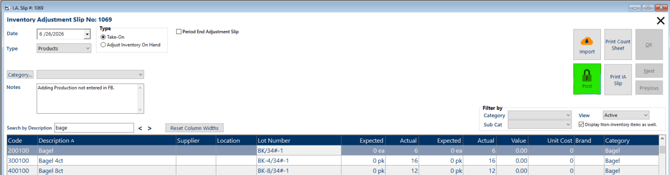
Tip: Use a Take-On IA Slip for your first addition to a location; use Adjust only for changes to existing inventory.
Additional Grid Options
Adjusting What You See in the IA Slip Grid
FlexiBake provides several options for customizing the IA Slip product grid to show only the items you need:
- Filters: Filter the Items grid by categories related to the item type (Product, Recipe, or Raw Material).
- Views: Choose between All, Active, or Inactive to limit which products, raw materials, or recipes display in the grid. For example, setting to Active will only display items that are currently marked as active in your database.
- Display Non-Inventory Items: Enable this checkbox if you want to display products and recipes that are not marked as inventory items. This is helpful for setup, troubleshooting, or when you need to make an item temporarily visible without affecting its inventory on hand status.

Warning: Changing a filter will clear all lots and quantities currently in the grid. Please set your filters before entering data.
Tip: Use these options to quickly locate or hide seasonal items, test recipes, or newly added products that may not yet be fully configured as inventory items.
You can watch a video version of this tutorial below: