FlexiBake allows you to Export your Invoices through a CSV format, see our related article Setup Accounting Preferences for CSV (QuickBooks Online) for full instructions on setting up FlexiBake for QuickBooks Online (CSV Format).
FlexiBake has recently released a new Integration that syncs directly with QuickBooks Online, please find that within Set up QuickBooks Online and Sync with QuickBooks Online.
Once this has been set up, there are a few steps required to have the connection line up with your Products and Services in QuickBooks Online. There are a few limitations to the QuickBooks Batch Import such as: a 1000 lines/rows maximum per file and no negative values, this means discounts need to be applied in QuickBooks for them to display correctly.
Exporting to CSV for QuickBooks Online.
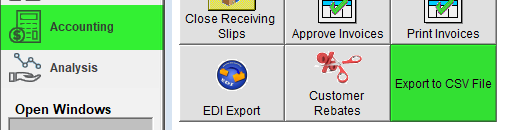
- Opening on the Accounting Centre, select Export to CSV.
- Define the Date Range you would like to Export For, or choose Export All.
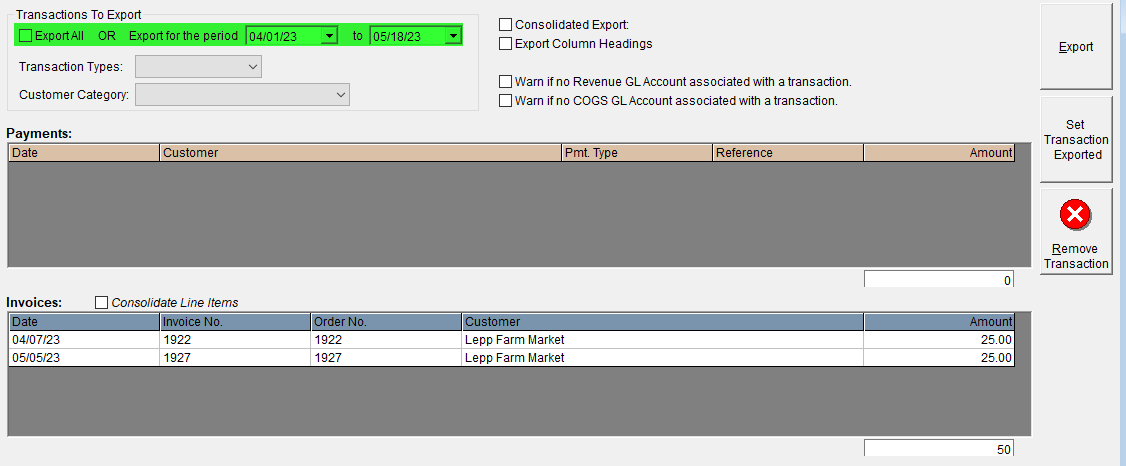
QuickBooks Online only allows a transmission of 1000 records per import, so we suggest doing daily, or weekly exports to stay within QuickBooks Import Limit. - We suggest turning on Export Column Headers, which adds a row of column descriptions you may use to connect the Data in QuickBooks Online.

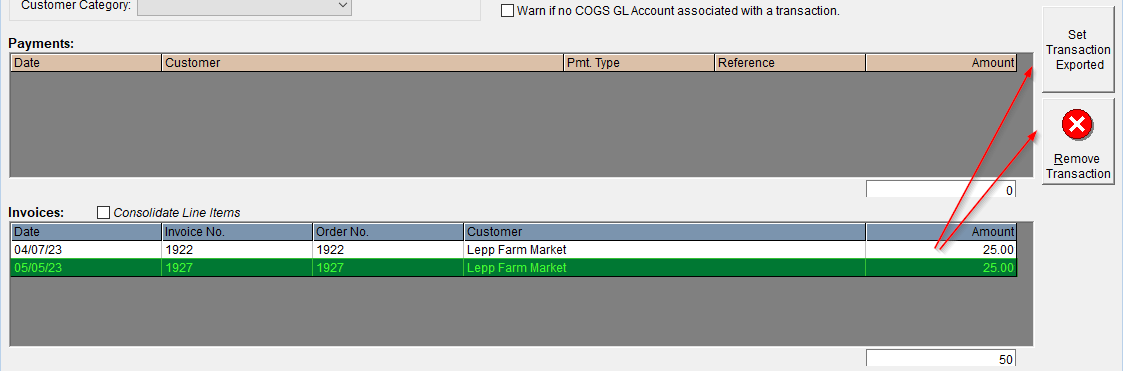
- You may remove, or mark records as exported to remove them from the Export File.
- Once complete and your parameters are set, press Export and select your Save Location.
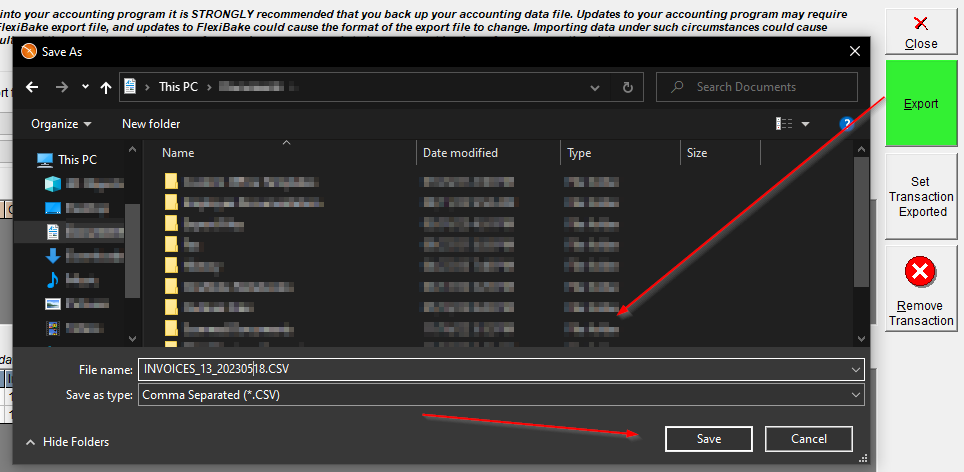
This may take a few minutes and will display a message to confirm successful transmission. - A message will appear asking if you would like to mark transactions as exported, pressing yes will lock that transaction batch from future edits or exports.

Should you require assistance reversing a Export Batch, please contact us at support@flexibake,com while providing the Exported Date or Invoice/Payment Numbers.
Checking / Manipulating the Export File.
As mentioned earlier in the article, QuickBooks Online has some limitations on how much information they will take at one time, this is limited to 1000 rows in a CSV or 100 transactions. QuickBooks Online also does not take Discounts, these must be imported through an additional 3rd party software
- You can import a maximum of 100 invoices at a time with a 1,000 row limit per spreadsheet.
- You can import invoices with single or multiple line items.
- You can also import a large volume of customers and vendors or products and services .
- You can’t add discounts, credit memos, or negative amounts in general.
This section will display a few tips and tricks for manipulating and setting up your file for Import. further information can be found directly on QuickBooks Intuit helpdesk; https://quickbooks.intuit.com/learn-support/en-us
You can manipulate the CSV exported to better match the Data you have set up in QuickBooks Online, Some common issues are more than 1000 rows or 100 transactions, or your Import File has commas.
Start at the end of the Excel document, and create a new sheet, then select the last 800-900 lines, and CUT + PASTE them over into the new sheet. 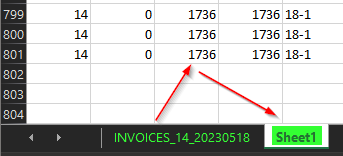
You can then quickly Rename and Export this sheet as a new CSV ready for Import into QuickBooks Online - Repeat as needed, or export a smaller date range.
Text Fields should be able to take commas but if you run into any issues you may quickly resolve these in Excel, or other text editor by highlighting the column, pressing CTRL + R, entering a "," and having nothing entered in the replace form. Press Replace All, and all commas will be removed from the selected column. 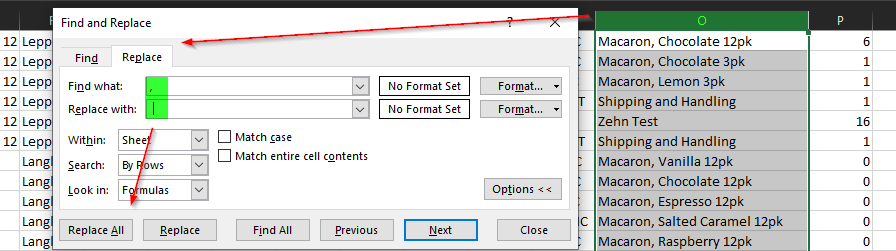
Please Note, this step should only be completed if you return errors relating to your Services or Products not lining up.
Batch Import to QuickBooks Online.
The common way to Import Invoices via CSV to QuickBooks Online is through the Batch Import Invoices Tool, which allows you to Import CSV files to your QuickBooks Datafile.
- Login to QuickBooks Online.

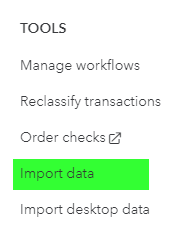
- Click the gear icon.

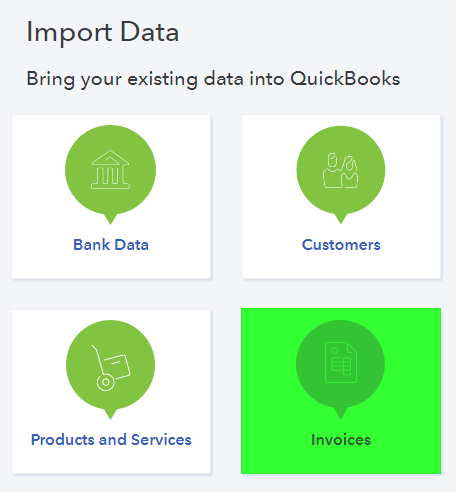
- Click Import Data under TOOLS.
- Click invoices.
- Click browse and select your CSV file.
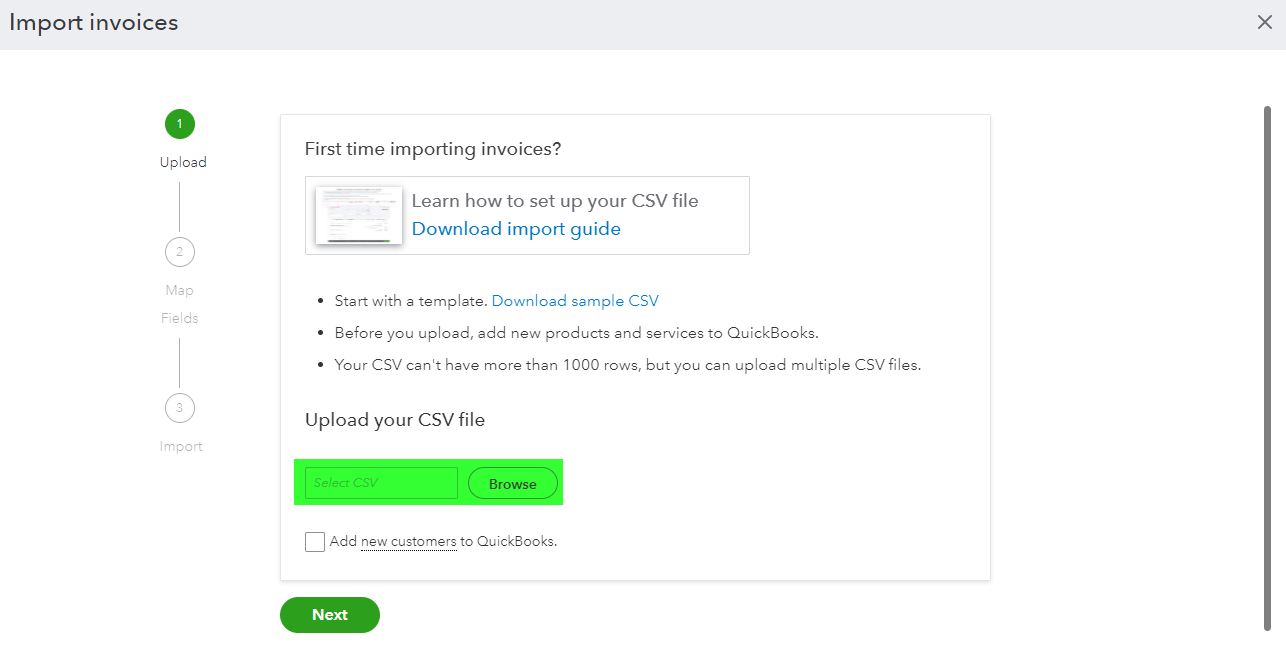
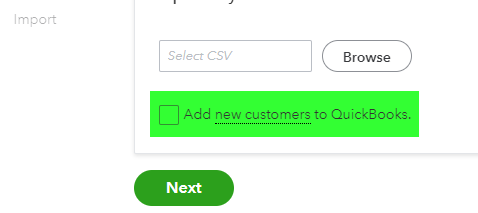
- Check box add new customers (Optional) if you have Customers in FlexiBake which are not in QuickBooks Online - Please be aware, QuickBooks matches based on Customer Name which must match exactly.
- Click next.

CSV Fields will need to be matched to Field in QuickBooks, a sample of which follows: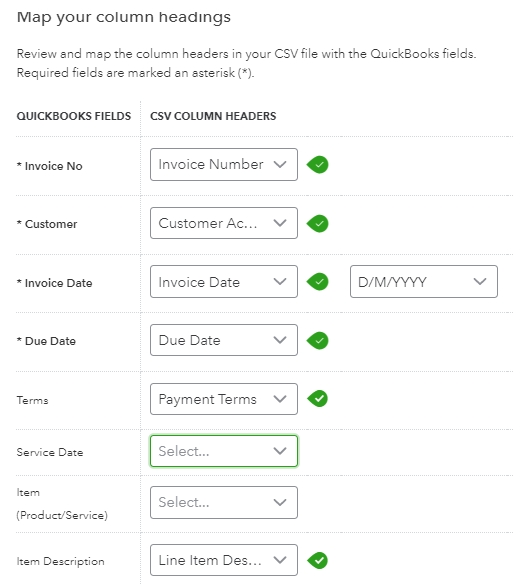
- Invoice No - Invoice Number
- Customer - Customer Name
- Invoice Date - Invoice Date
- Due Date - Due Date
- Terms - Payment Terms
- Code - Line Item Code
- Item Description - Line Item Description
- Item Quantity- Quantity Shipped
- Item Rate - Unit Price
- Item Amount - Amount
- Click Next.

- Click Import
QuickBooks Online will then import the file and invoices as defined on the Import Sheet! Further information, or troubleshooting steps may be found with Intuits' Support Portal.
Entering Discounts in QuickBooks Online.
When using Discounts in FlexiBake, these will need to be applied manually to the invoices in QuickBooks Online. This can be performed through the following steps:
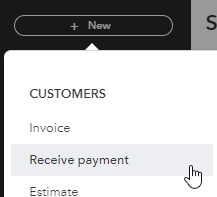
- Click +NEW
- Receive Payment.
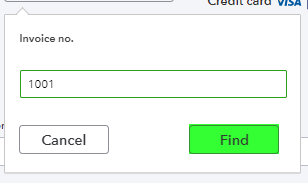
- Find by invoice no.

- Type in invoice number, find.
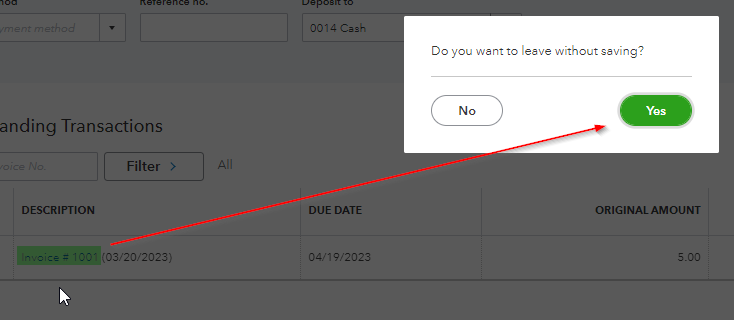
- Click the Invoice Name, and press Yes to move to the invoice directly.
- Add a new line under column "products and service", either select your discount service or create a new one.

- Under column "Amount" type in the negative discount amount.

- Click save.