This guide will take you through how to set up and connect FlexiBake to QuickBooks Online so that you can sync products, customers, invoice, credits and payments at the click of a button.
Preparation Checklist
Before beginning the setup process, you'll want to make sure that a few things are in order to ensure things connect as seamlessly as possible:
- Make sure that Multi-Factor Authentication is set up on your QuickBooks Online account. You can learn more about this here.
-
Ensure Product Codes in FlexiBake match the Item Name in QuickBooks Online exactly.
-
Ensure Customer Names in FlexiBake match the Customer Name in QuickBooks Online exactly.
-
If you plan to use freight/shipping charges in FlexiBake, ensure Shipping is enabled in QuickBooks online
-
If you plan to sell to customers in more than one currency, ensure that QuickBooks Online is set to Multicurrency mode and that all currency codes in FlexiBake match those in QuickBooks online.
- Make sure that the currencies you plan to use are defined in both QuickBooks Online and FlexiBake, and that the currency codes match
-
Make sure that your payment methods in QuickBooks Online match the payment types defined in FlexiBake.
- Turn off Auto-apply credit notes in QuickBooks Online.
Connecting FlexiBake to QuickBooks Online
Step 1
Log into FlexiBake as a user with Administrator permissions.
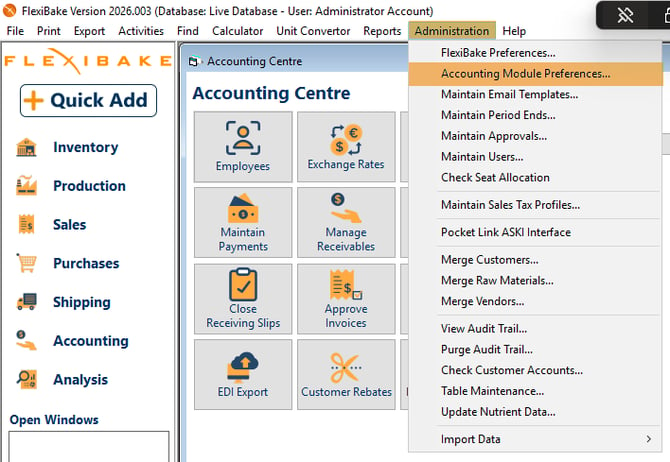
Step 2
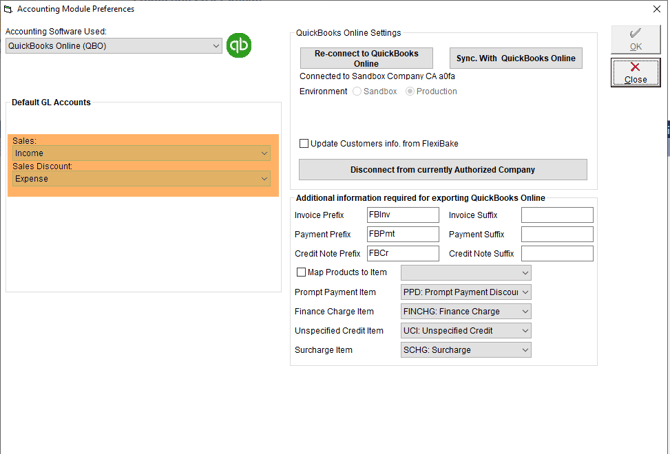
Go to Administration > Accounting Module Preferences in the upper menu bar.
Step 3
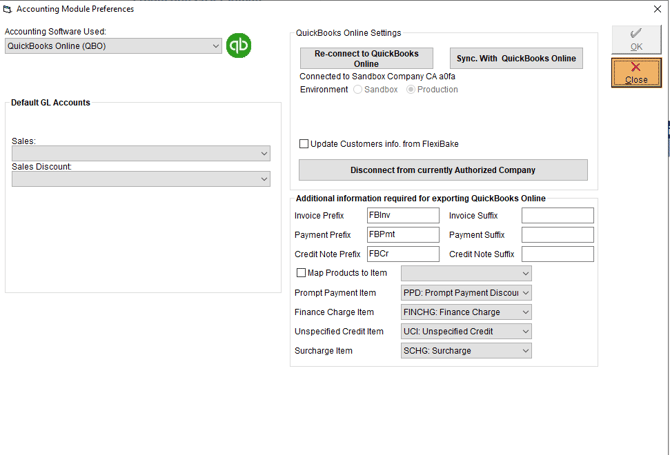
In the Accounting Software Used dropdown, select QuickBooks Online.
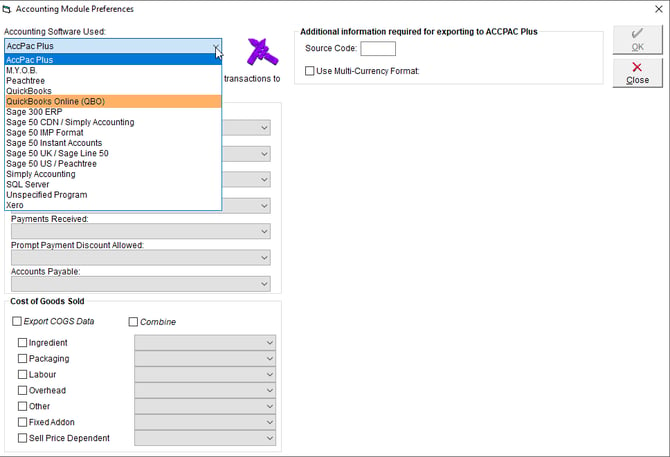
Step 4
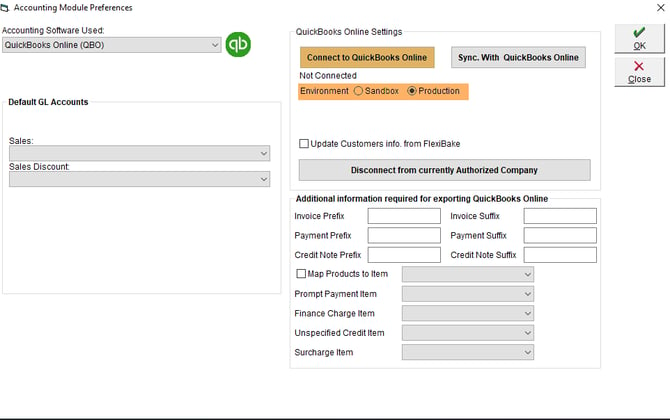
Select if you want to connect to a Sandbox QBO data or a Production (Live) QBO database, then click Connect to QuickBooks Online. A new browser window will open.
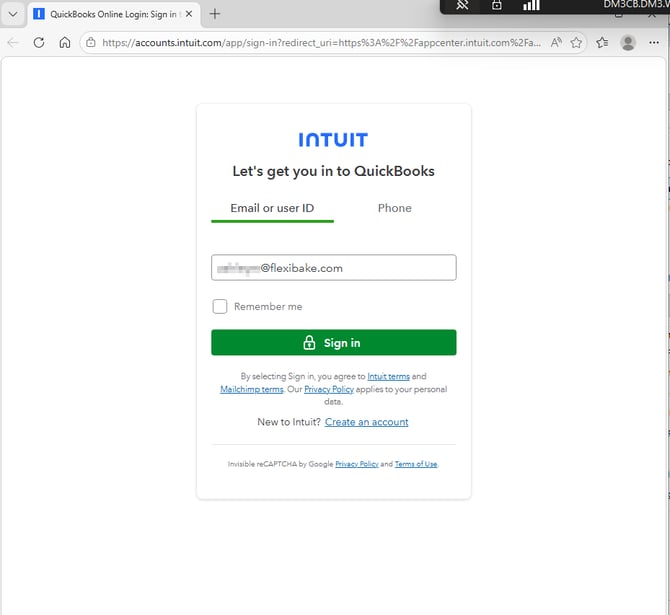
Step 5
Log into your QuickBooks Online account.
Step 6
Select the QuickBooks company to link to FlexiBake, then click Next.
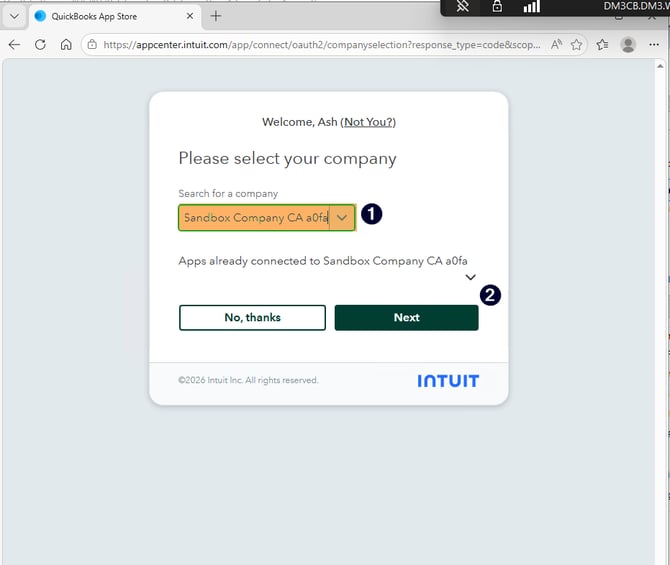
Step 7
When the window confirms authorization, close the browser and click OK on the popup.
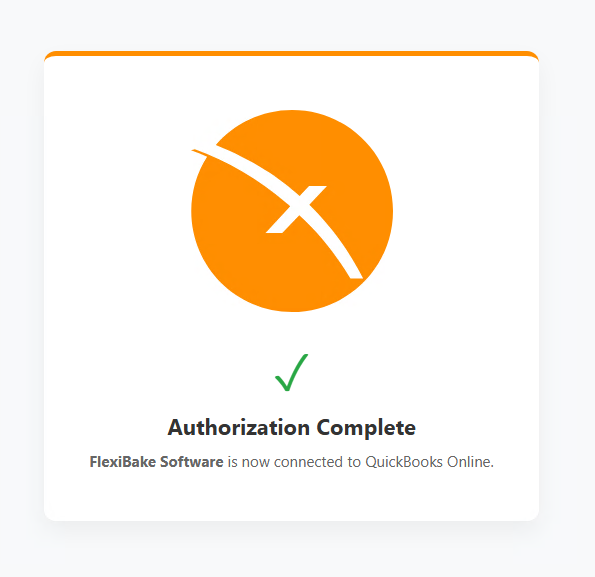
The Accounting Preferences window will show a successful connection.
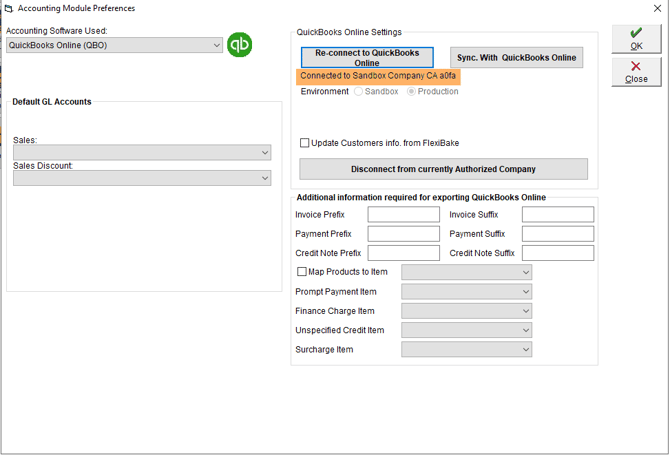
Step 8
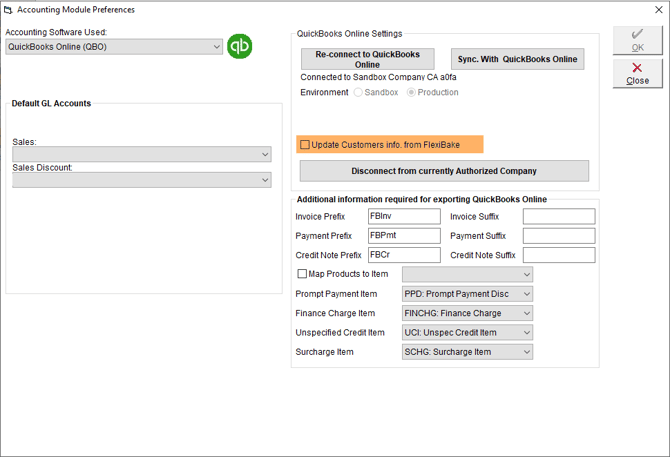
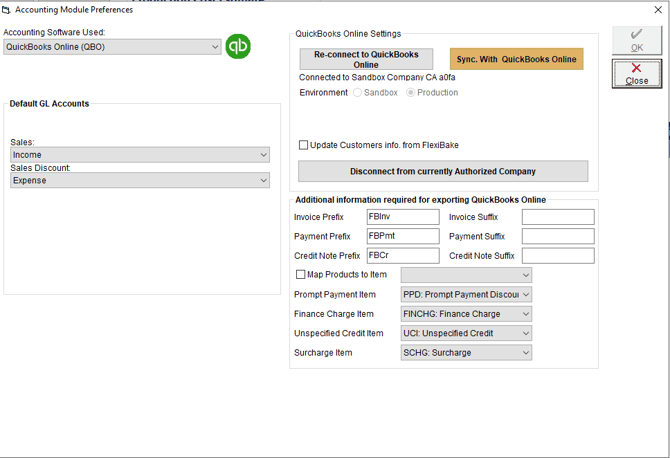
(Optional) To attribute all FlexiBake sales to one product code, check the Map Products to Item box and select a product or service from your connected QuickBooks Online company.
All line items will output under this code with the FlexiBake product name as the description.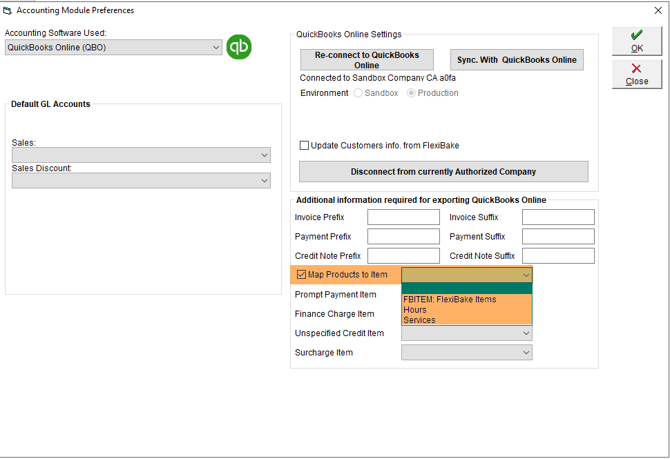
Step 9
(Optional) If you would like FlexiBake to be able to update Customer names in QuickBooks Online when the customer's name is updated in FlexiBake, check the Update Customers Info from FlexiBake box.
Step 10
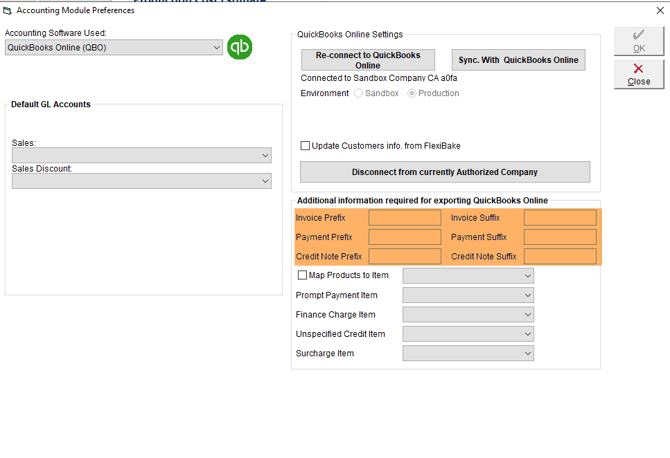
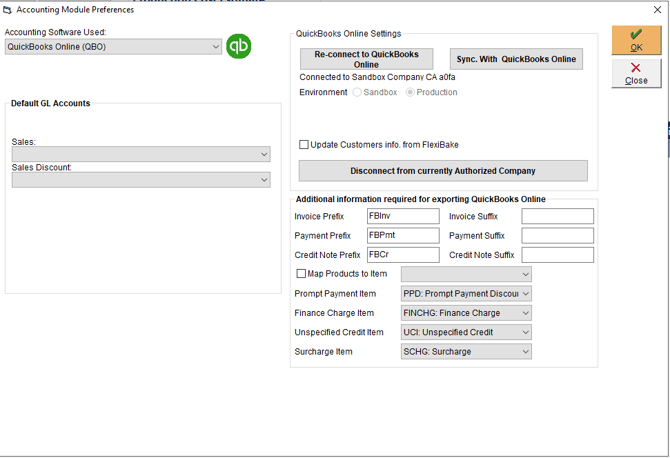
Add a prefix or suffix for invoices, payments, and credit notes to differentiate FlexiBake transactions and avoid document conflicts.
Step 11
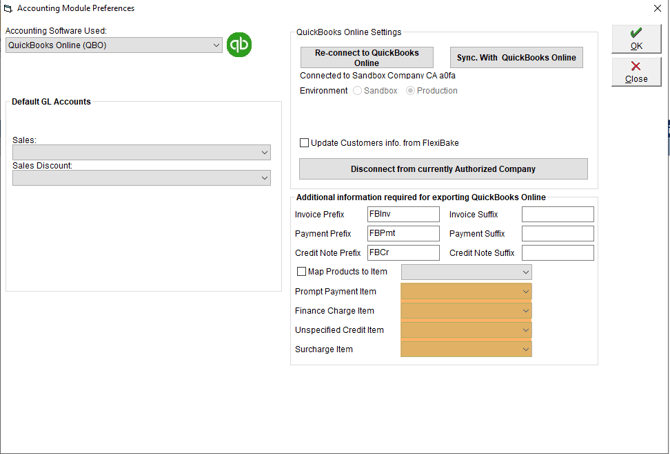
Map FlexiBake features to QuickBooks services or products as required:
- Prompt Payment Discounts: FlexiBake offers an additional discount on invoices according to the payment terms, but QuickBooks does not support this, so the discount must be mapped to a product/service item.
- Finance Charges: These create an additional invoice for the customer and must be mapped to a product/service item in QuickBooks
- Unspecified Credits: QuickBooks requires credits be mapped to a product/service, but FlexiBake allows credits to be created that are not linked to a specific item
- Surcharges: QuickBooks does not support negative discounts, so the charge must be attributed to an item or service.
Step 12
Click OK to save changes.
Step 13
Click Close.
Linking GL Accounts between QuickBooks and FlexiBake
Next, we need to map GL Accounts from your QuickBooks Chart of Accounts to FlexiBake so that transactions and items are attributed correctly during the sync.
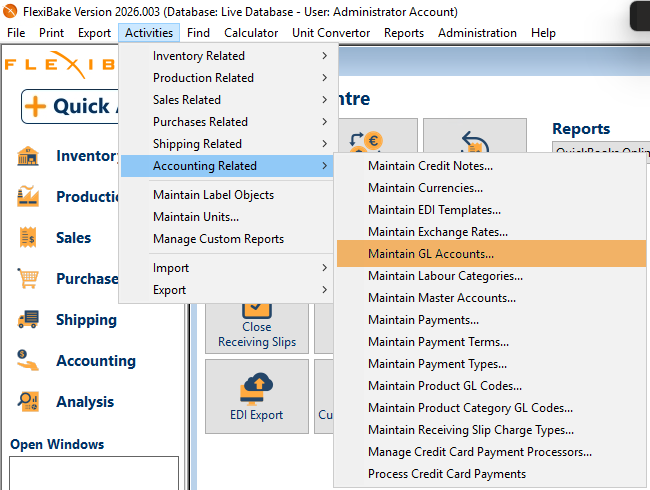
Step 1
Navigate to Activities > Accounting Related > Maintain GL Accounts.
Step 2
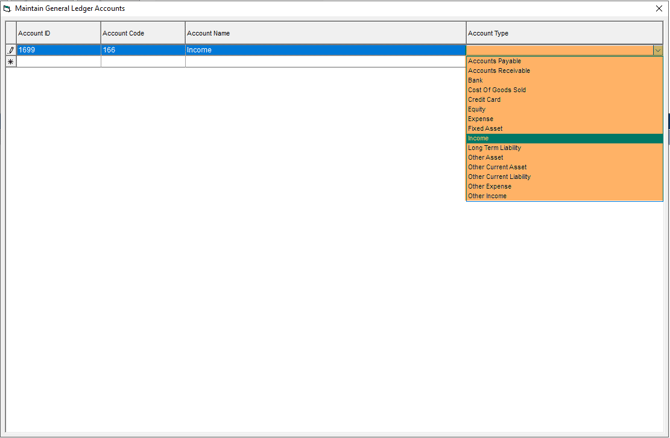
In the pop-up, click on a blank line in the Account Name column to show the dropdown list.
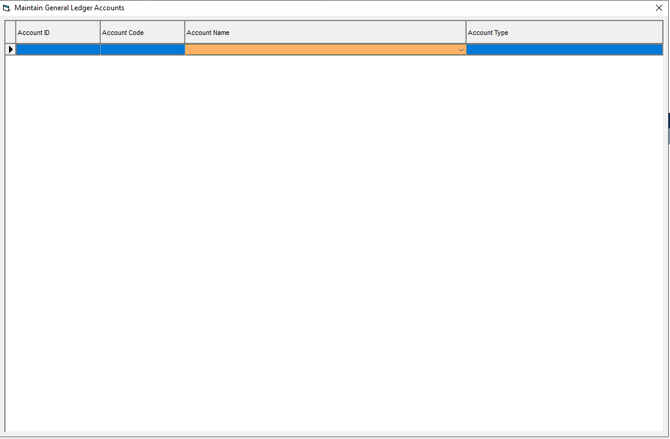
Step 3
Click the dropdown arrow and select from the GL accounts available in your connected QuickBooks Online company. The Account ID and Account Code fields populate automatically.
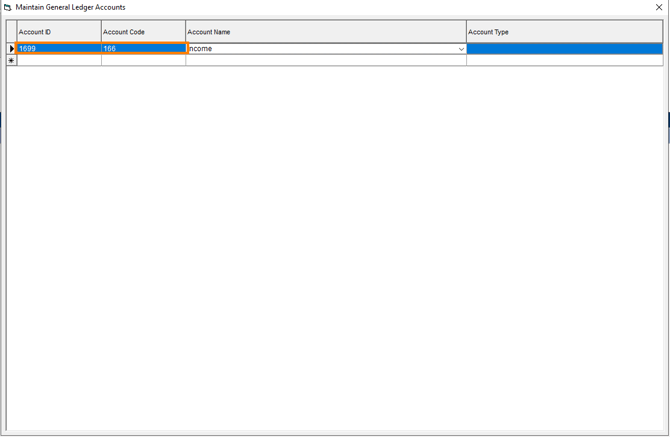
Step 4
Select the Account Type using the dropdown—at least one income account is required for QBO integration.
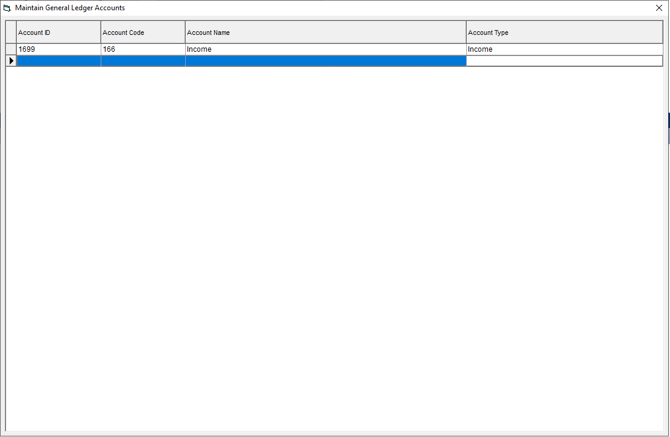
Step 5
Hit the Enter key to move to the next line and save the account.
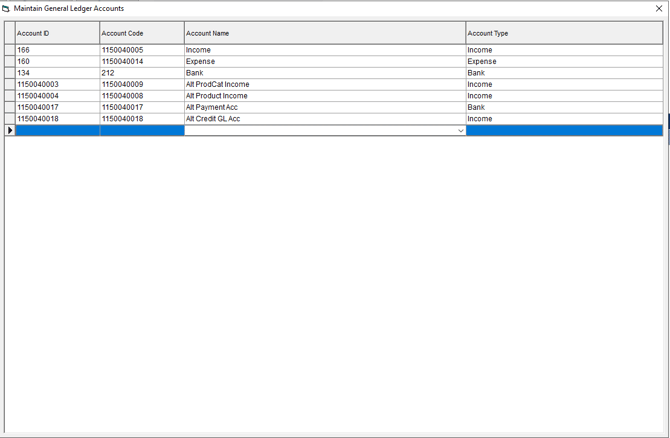
Step 6
Repeat to link all desired accounts.
Step 7
Close the pop-up with the X button.
Assigning GL Accounts
Next, we need to map the GL Accounts just linked to the transaction types or items that need them.
Assigning Default GL Accounts
The FlexiBake-QuickBooks Online integration only needs default GL accounts set for 2 things: sales and sales discount. The Sales default GL account is the default GL account assigned to products created in QuickBooks Online by FlexiBake, and the Sales Discount default GL account is used for discounts on invoices.
Step 1
In the upper menu bar, open the Administration menu and then select Accounting Module Preferences
Step 2
In the Default GL Accounts section, use the drop-down to assign GL accounts to Sales and Sales Discount
The Sales Discount default GL account drop-down will only contain Income and Expense type GL accounts.
Assigning Product Category GL Accounts
If you have certain product categories that you would like their sales to be attributed differently, you can assign the category to an Income type GL. All products assigned to the category will be linked to the assigned GL account if FlexiBake needs to create the product in QuickBooks Online.
Assigning a Product Category GL account in FlexiBake will not update the product if it already exists in QuickBooks online. FlexiBake will only set the GL accounts on products when creating them in QuickBooks Online.
Please see the guide Assign GL Codes to Product Categories to learn more
Assigning Product GL Accounts
Need to get more specific? You can also assign GL accounts on a per-product basis, which will override the default Sales GL Account and the Product Category GL account when FlexiBake creates the product in QuickBooks Online.
Assigning a Product GL account in FlexiBake will not update the product if it already exists in QuickBooks online. FlexiBake will only set the GL accounts on products when creating them in QuickBooks Online.
Please see the guide Assign GL Codes to Products to learn more
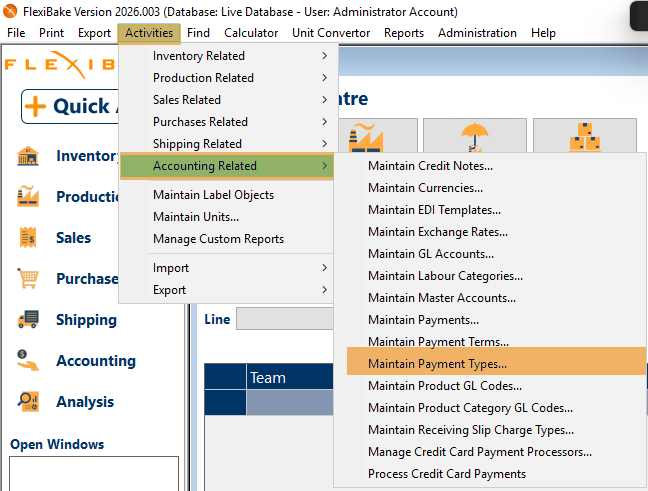
Assigning Payment Type GL Accounts
If you have different GL accounts for certain payment types, you can assign these in FlexiBake. Payment types that do not have a GL Account defined will be assigned to the default used by QuickBooks Online's chart of accounts.
Step 1
In the upper menu bar, open the Activities menu, hover over Accounting Related, and select Maintain Payment Types.
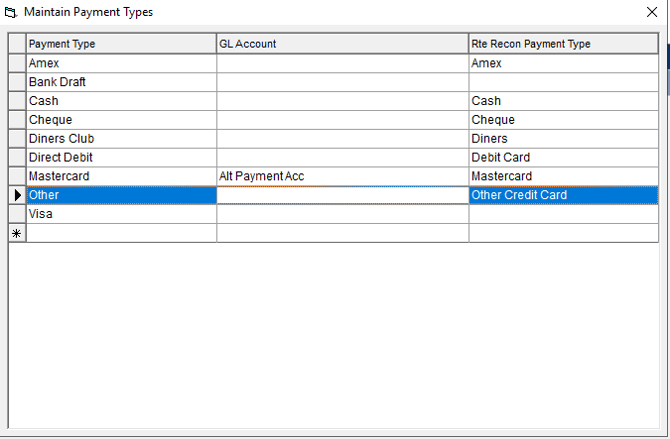
Step 2
In the GL column, click once on the row for the payment type you want to assign a GL account to. A drop-down arrow revealing available Bank-type GL accounts will appear.
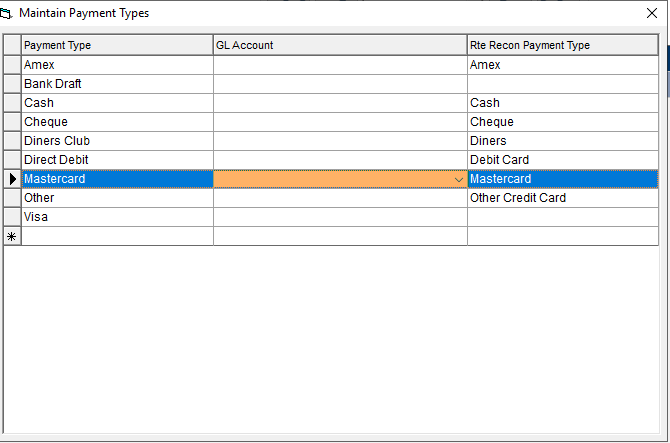
Step 3
Select the desired GL account from the drop-down. Press the Enter key to move to the next line and automatically save your selection.
What about other GL Accounts?
While there are other areas in FlexiBake that GL Accounts can be linked, they are not compatible with this integration.
Setting Up Sales Taxes (optional)
If you plan to charge sales taxes on your transactions, please follow the guides below to set up taxes in FlexiBake to be compatible with QuickBooks Online's requirements
Performing the Initial Sync
The initial sync establishes a connection between your FlexiBake records and QuickBooks Online. Any missing products, customers, or payment terms will be created in QBO during this process.
Step 1
In the upper menu bar, open the Administration menu and select Accounting Module Preferences.
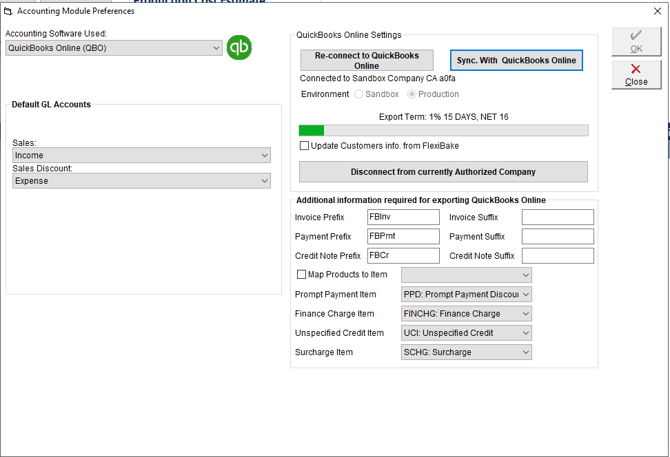
Step 2
Click Sync with QuickBooks Online. A progress bar will indicate records being synced between FlexiBake and QBO.
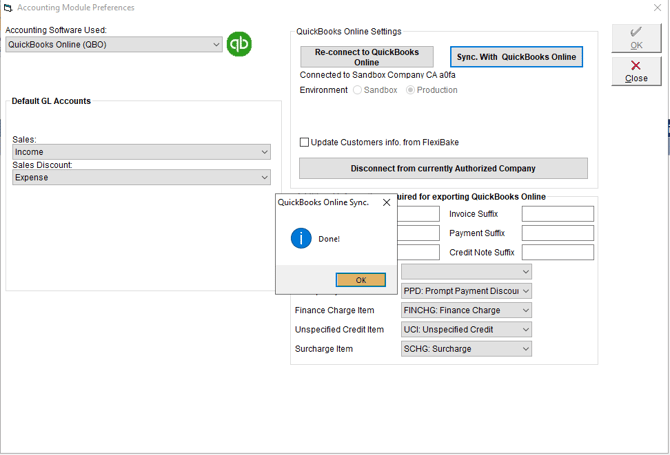
Step 3
When the sync is complete, a pop-up will appear. Click OK to continue.
Step 4
You can now close the Accounting Module Preferences window.

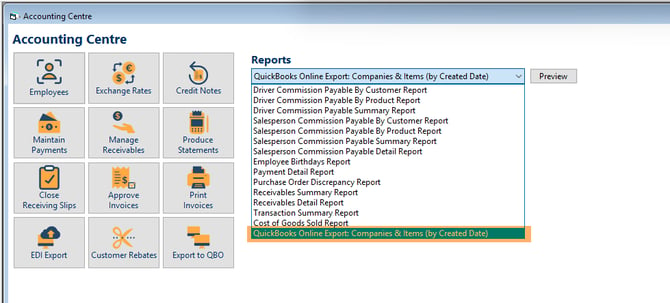
Step 5
(Optional) To review the customers and products FlexiBake created during the sync, you can use the QuickBooks Online Export: Companies & Items (by Created Date) report, accessible from the Accounting Centre Reports drop-down.
To learn how to sync your transactions to QuickBooks Online, please see Sync Transactions to QuickBooks Online