If you typically upsell your Route Delivery customers, or like to have payments dealt with at the time of delivery, FlexiBake makes this process handy and intuitive.
Before using Route Reconciliation in FlexiBake, there are a few things that need to be set up for optimal use. Consult the articles below to ensure proper setup before proceeding.
Set Up Route Reconciliation Customers
Once the above tasks are completed, you are ready to use Route Reconciliation in FlexiBake!
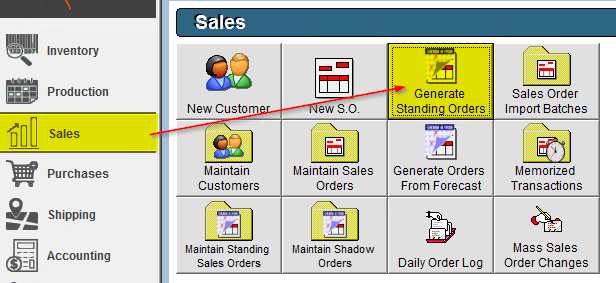
To start, Generate your Route Standing Order by navigating to the Sales Centre, and clicking into Generate Standing Orders.
Along with your customers’ Standing Orders, ensure your Route Standing Order is selected. Click Generate Orders to enter your Standing Orders into your system.
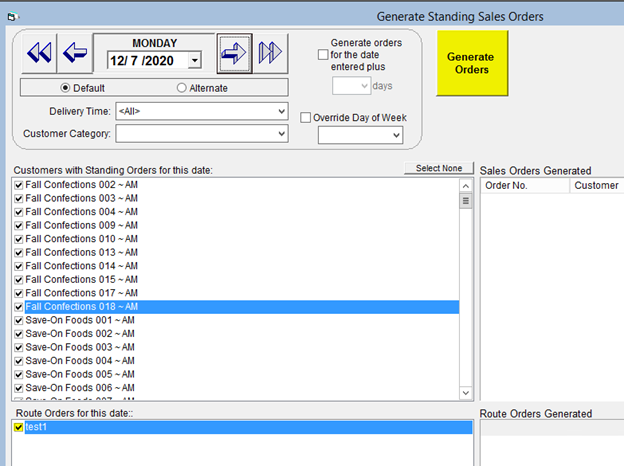
Having your Route Standing Order generated will tell FlexiBake to include that much more product in Quantity Required to satisfy orders.
Once production is posted, you can then (Generate Route Delivery Slips) to ship out your product. Once generated, customers marked for route reconciliation will automatically generate an invoice and credit note, as well.
(Note: For Route Reconciliation customers, it is important that, for the blank invoice to print, there is no Customer Standing Order in place for that customer. Otherwise, instead of a blank invoice, FlexiBake will pull the Customer Standing Order instead. Account for what they typically purchase in the Route Standing Order you’ve set up for them!)
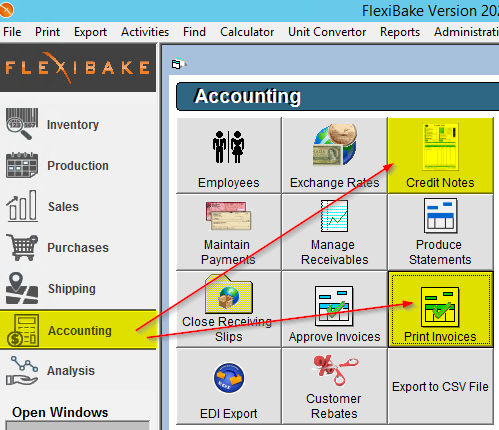
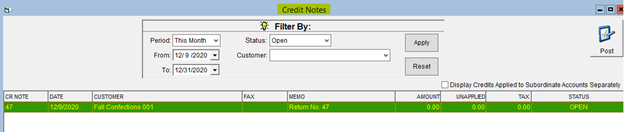
You can find these auto-generated documents in the Accounting centre, under Print Invoices and Credit Notes, respectively.
You can print these documents off by:
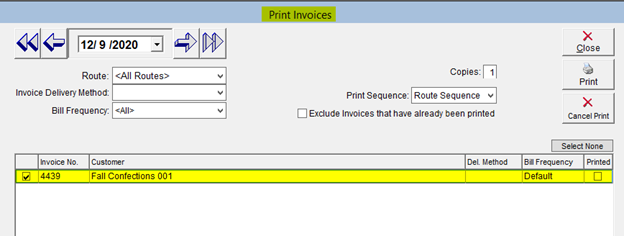
- Invoices: Selecting the desired invoices to print, and clicking Print in Print Invoices (as shown above)
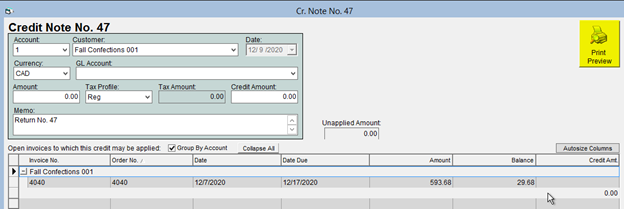
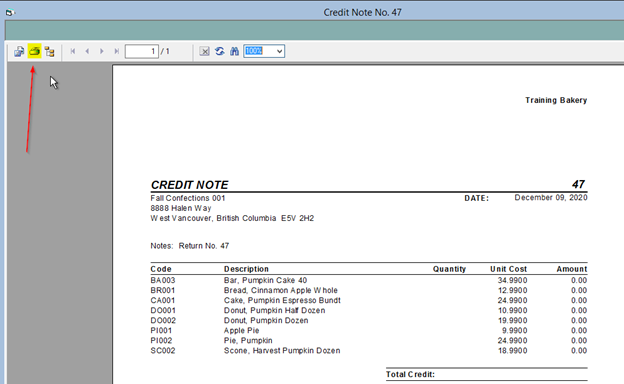
- Credit Notes: Clicking into the desired credit note(s), click Print Preview, and click Print Report in the top-left when viewing the blank Credit Note.
Your drivers will take these documents with them to perform transactions with customers as they go along. Once they return, you will have to enter this information into FlexiBake.
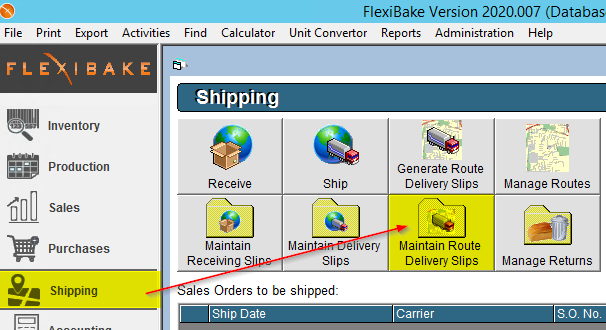
You can do this by navigating to, in FlexiBake, back to Shipping -> Maintain Route Delivery Slips.
Once there, click Invoice All to invoice your route deliveries. This will allow you to manage the customer’s payments through the Reconcile feature in the bottom-right. Click into that menu when ready.
(Note: If you wish to reverse an invoice after clicking Invoice All, simply click into the desired Delivery Slip, and click Reverse Invoice.)

Here, you will be able to detail the quantity of product shipped on each of your routes, and account for disbursements, as well as returns.
There are a few things to inspect in this interface:
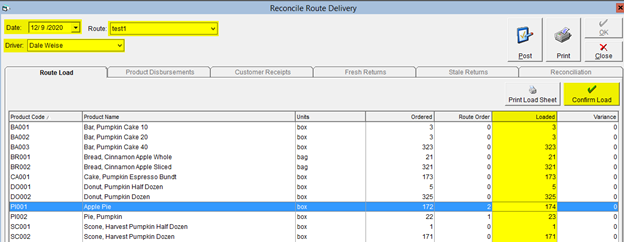
- Make sure your desired Date is selected from the Date drop-down.
- Select the proper Route you wish to reconcile from the Route drop-down. This will automatically populate the route’s default Driver in the Driver field. However, you can select others by choosing from the drop-down Driver menu, as well.
- The Loaded column indicates how much of the product you’ve loaded onto the truck for this route. This defaults to the quantity of product Ordered plus what’s been indicated on the Route Order. You can click into these fields and change them at your leisure, if you happened to have included more or less product in total on that particular route.
- Once you are content with these settings, click Confirm Load. This will allow you to click into the other tabs in this screen.
Proceed by clicking into Product Disbursements.
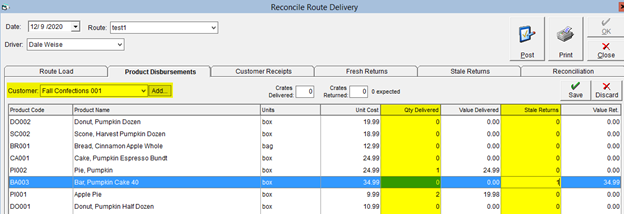
Choose your desired customer from the Customer drop-down. This will automatically pull the customer’s Standing Order, if applicable, into the Qty Delivered column. Otherwise, it will simply list their Shadow Order in that column instead. Fill in the delivered quantities in this column as reported by your driver for this customer. You can also fill in any documented Stale Returns on a per-product basis in the Stale Returns column. The adjacent Value columns will total the value of product delivered and returned, respectively. These value fields will pull through into that customer’s Invoice and Credit amounts, as well. Click Save to confirm the values you’ve entered.
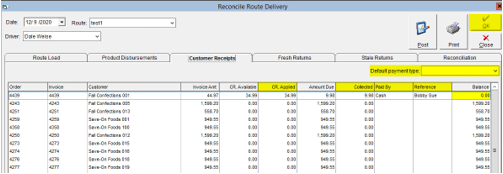
The Customer Receipts tab documents the amount due for invoices pertaining to this route. The Invoice Amt and CR Available columns pull through values from the customer’s outstanding sales or returns, respectively. In the CR Applied and Collected columns, type in how much available credit / payment you would like to apply to the invoice. You can view the remaining amount left after credits are applied on an invoice in the Amount Due column. The total amount remaining on the invoice is shown in the Balance column. You can select the payment method in the Paid By column, and indicate the Reference in the Reference column. If you typically receive payments by a particular method, you can select that in the Default Payment Type dropdown. It will automatically pull through across each invoice with Collected amounts in the Paid By column. Once satisfied with your entries, click OK in the top-right corner; these entries will then be automatically applied to these invoices, and reflected in their respective statements in the Accounting center.
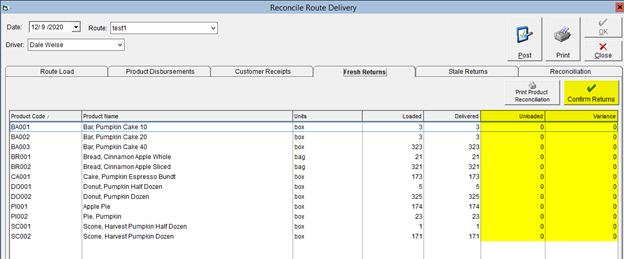
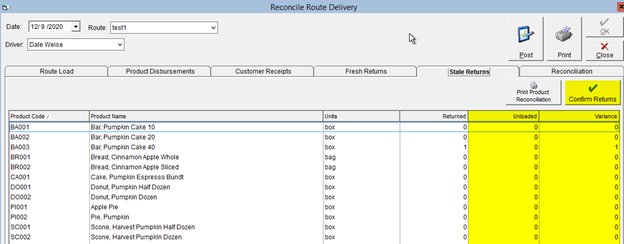
The Fresh Returns and Stale Returns tabs are to keep track of product unloaded back at your facilities. These screens are similar in structure. In both tabs, the Variance column will indicate the amount of each product you should be expecting to have returned. Indicate the amount of each product returned in the Unloaded column; any excess variance indicates misplaced product. Once satisfied with your entries, click Confirm Returns.
In the Reconciliation tab, you can confirm the payments exchanged on the route.
Under Receipts Reconciliation, you will find various fields to enter in the income totals you determine from the amounts your driver provides to you. You can compare these totals to the amounts FlexiBake anticipates to you beside those fields in Bold. After summing these fields, FlexiBake will indicate any discrepancies in the Difference field at the bottom of the section. Click OK in the top-right once you are content with your field entries here.
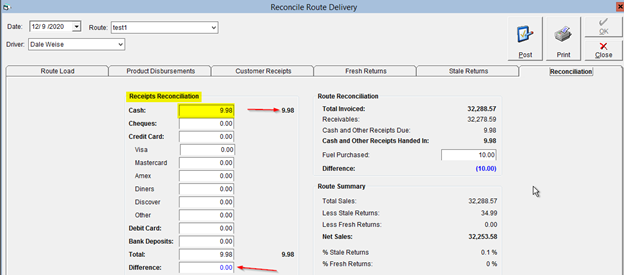
Under Route Reconciliation, you can compare your invoiced totals with the amounts received on the route. The Total Invoiced amount is the sum of all invoices for customers on the route, while the Reconciled field shows the amount unreceived across invoices in Customer Receipts. The Cash and Other Receipts Due / Handed In fields indicate the amount FlexiBake expects to be accounted for, and what is currently accounted for, under Receipts Reconciliation. As you enter values in under Receipts Reconciliation, the Difference amount will change accordingly. Finally, you can enter fuel purchases during the route in the Fuel Purchased field.
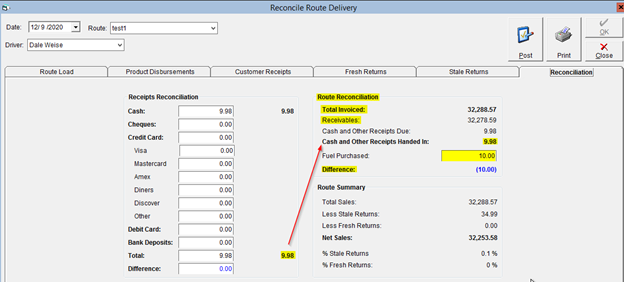
(Note: for the Difference fields, Blue text indicates even balances / acceptable spending (ie, fuel purchases), while Red text indicates discrepant balances.)
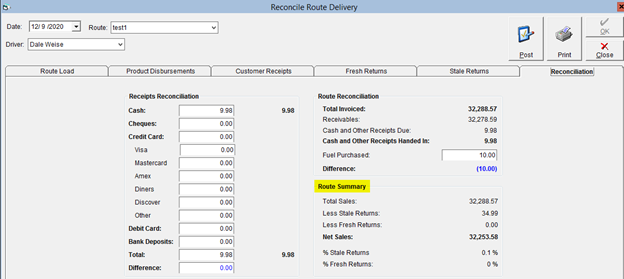
Under Route Summaries, you can get some informative sales statistics on the route. You can check these against historical sales records to gauge how successful your route delivery was compared to others!
Once again, once you are satisfied with the entries on this page, click OK in the top-right.
Perform this process for each desired customer, selecting them one-by-one from the Customer drop-down. If you happened to have sent an unscheduled delivery along that route for this day, you can account for this by clicking the Add button beside the Customer drop-down. You can choose which customer you delivered to unscheduled, along with a reference (name, keyword, etc). Click OK to add them to your list of customers to reconcile for that route.

Once this process is complete, you have successfully reconciled your route delivery accounts!