Product categories are a fantastic way to sort and filter reports, manage screens and break down sales during analysis. However, depending on what you use those categories for, you may not want your customers to see them, or you may want to simplify the categories when they're placing their order through the Online Ordering Portal.
Fear not, we've got you covered! You can have a separate set of categories that will be displayed instead of your internal product categories. This guide will cover how to enable and set up these categories for use.
Creating Web Order Categories
The first step to using Web Portal Categories is creating them. You'll need to set this for each product that is available on the portal using the steps below:
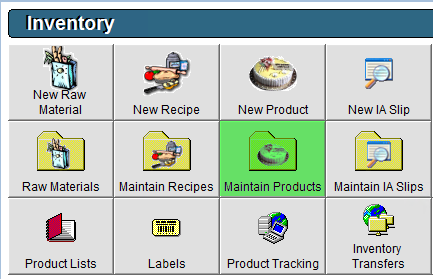
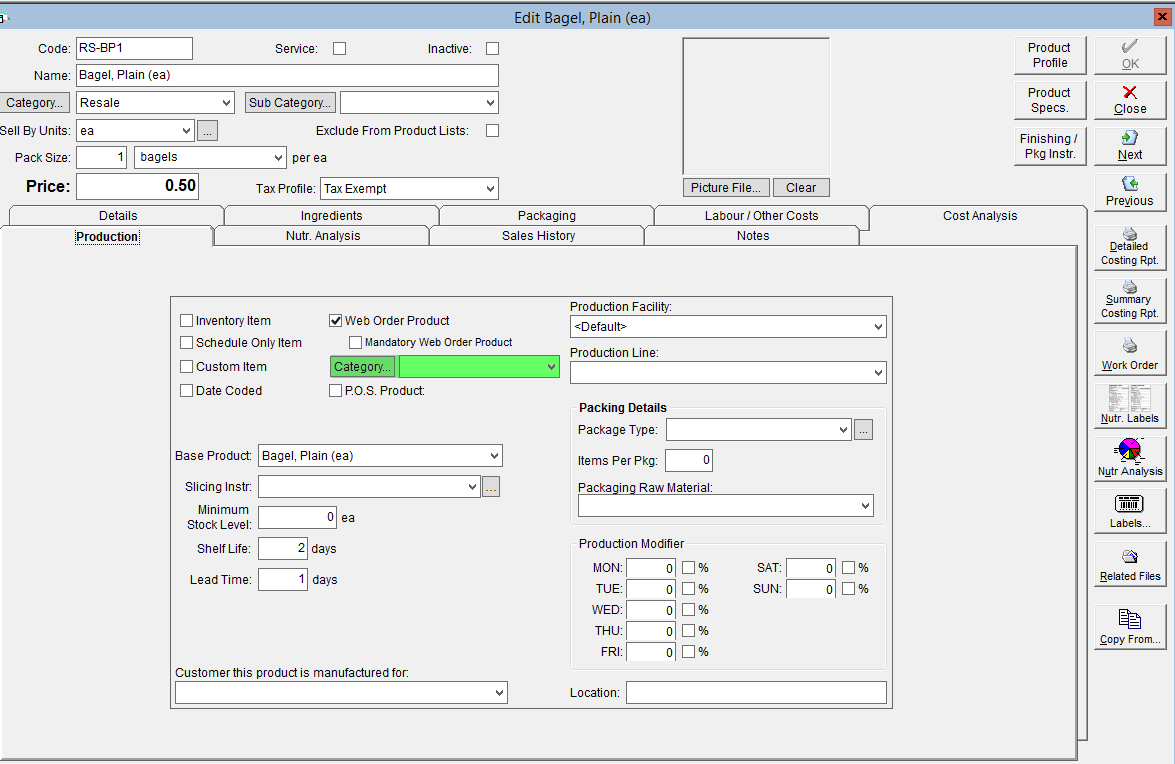
- In the Inventory Centre, click on Maintain Products.
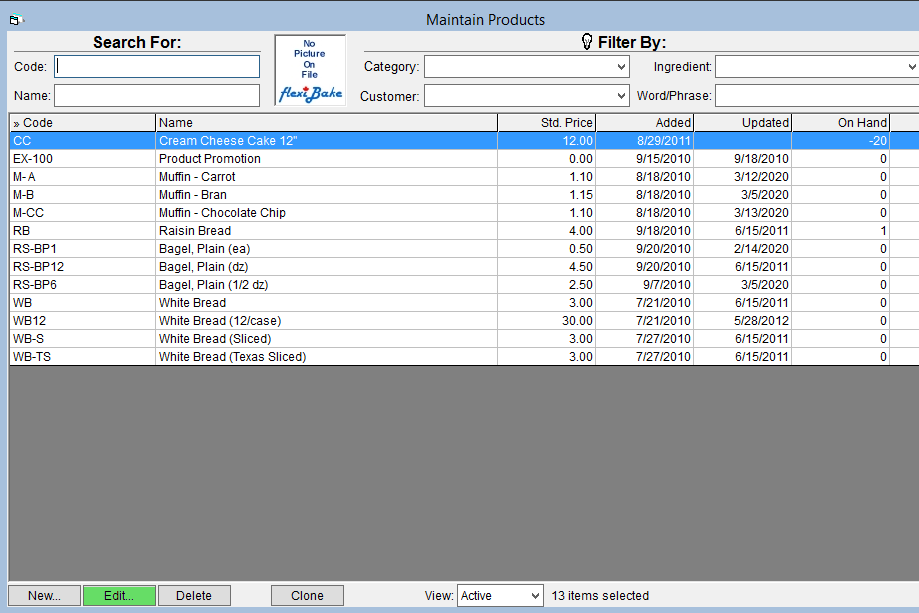
- Open a product either by double clicking on it, or clicking on it once to highlight your selection and then clicking the Edit button in the lower left.
- Click on the Production tab.
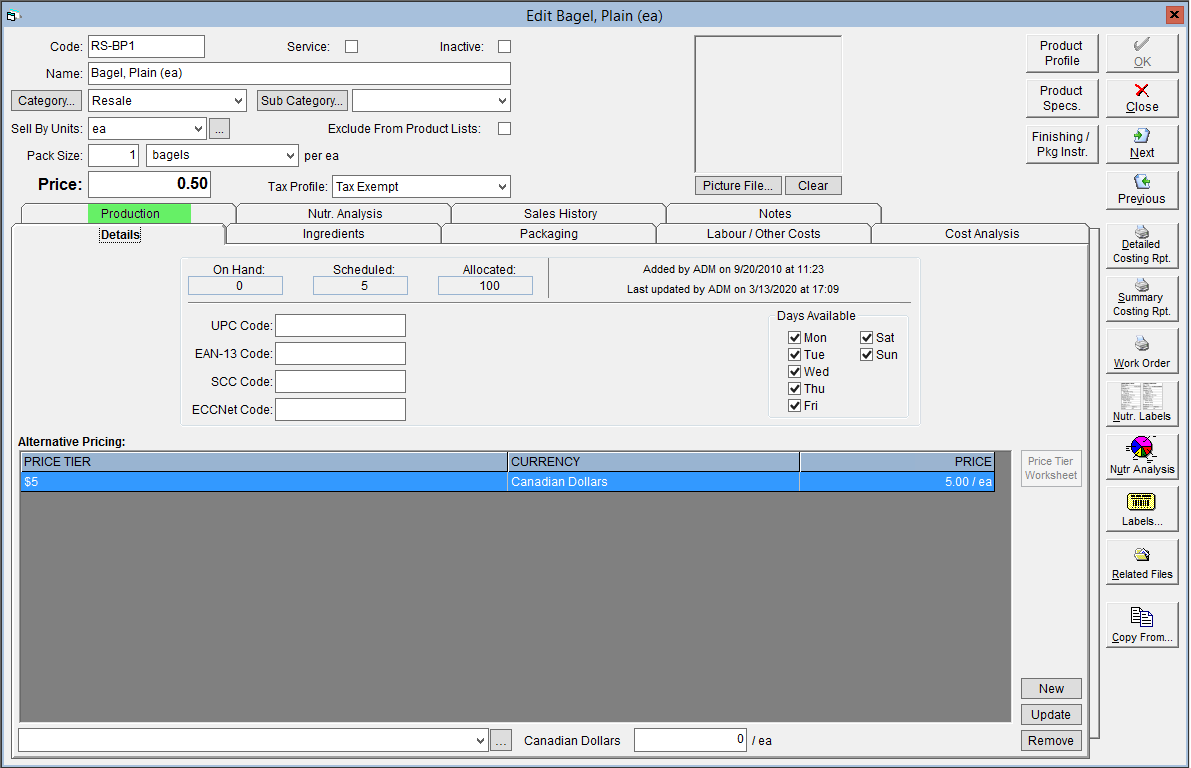
- Make sure that the Web Order Product box is checked. From the Category drop-down below, select the Web Order Category that you would like to be displayed for this product.
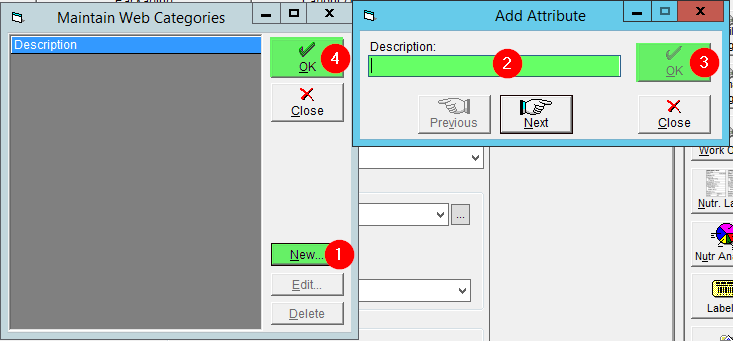
- To add a new Web Order Category, click on the Category button. This will open a pop-up. Click on New, add a name for the category in the description box, then click OK to save it. Click OK again to close the pop-up. This category will now be available for all products throughout FlexiBake.
- To add a new Web Order Category, click on the Category button. This will open a pop-up. Click on New, add a name for the category in the description box, then click OK to save it. Click OK again to close the pop-up. This category will now be available for all products throughout FlexiBake.
- Click OK to save your changes.

Enabling Web Order Categories
For these categories to be visible to your customers in the Online Ordering Portal, you'll need to enable them in your preferences:
- Login to your portal's admin page using an existing Portal Administrator.
Your admin page can be found by adding /setup to your portal URL. For example, if the portal address is bakery.flexibakeonline.com then the admin page address is bakery.flexibakeonline.com/setup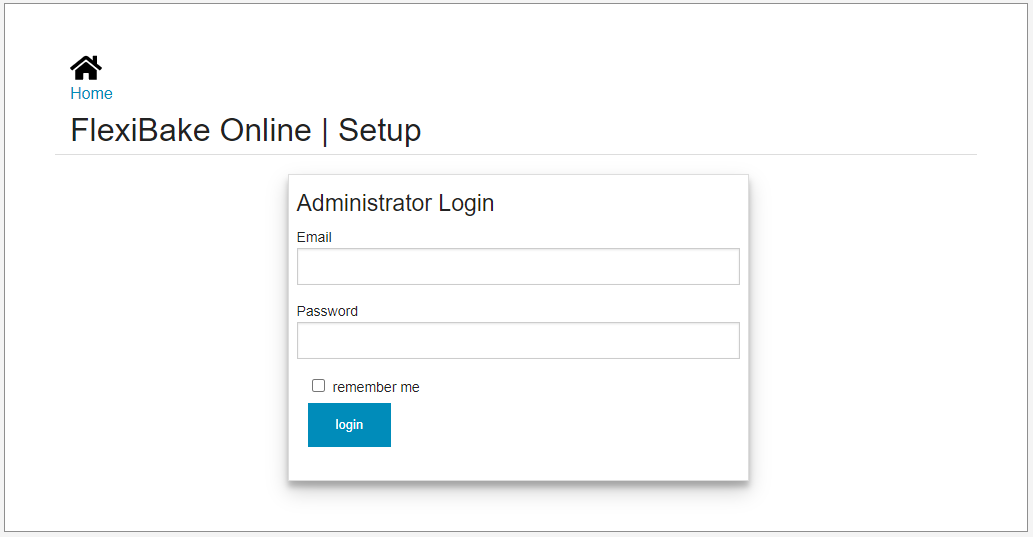
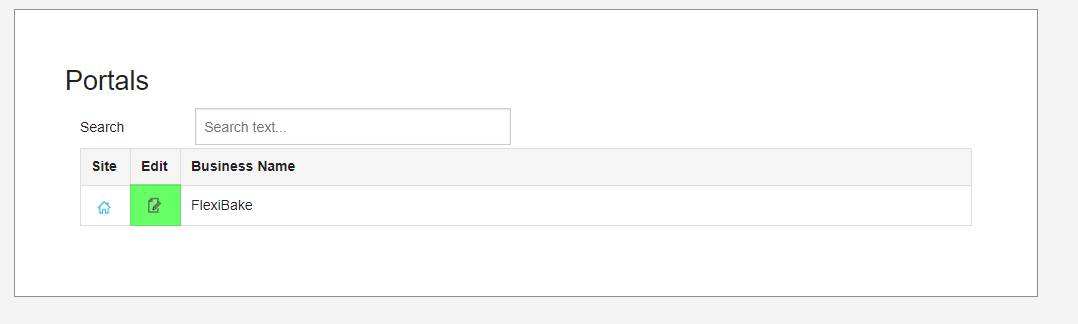
- Click on the Edit button next to the appropriate portal to open up the Settings page
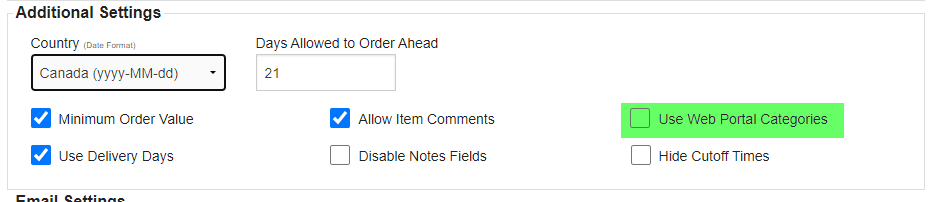
- Scroll down to the Additional Settings section and check the box labelled Use Web Portal Categories.
- Click Save at the top or the bottom of the page to put the changes into effect.