Managing multiple routes and dealing with their documentation can be an intensive process. In FlexiBake, however, you can print all your necessary documents quickly and efficiently. You’ll have the option to customize which customers get which documents, and can print them off with a single click.
To get started with printing Route Documents, follow these steps:
- From the Shipping Centre of FlexiBake, select either Generate Route Delivery Slips, or Maintain Route Delivery Slips. Please note, Route Delivery Slips must be generated for the related information to appear in Print Route Documents.
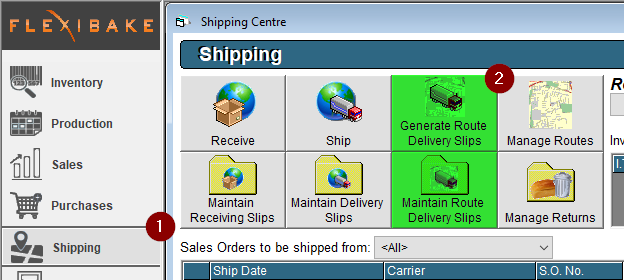
Generate Route Delivery Slips
Maintain Route Delivery Slips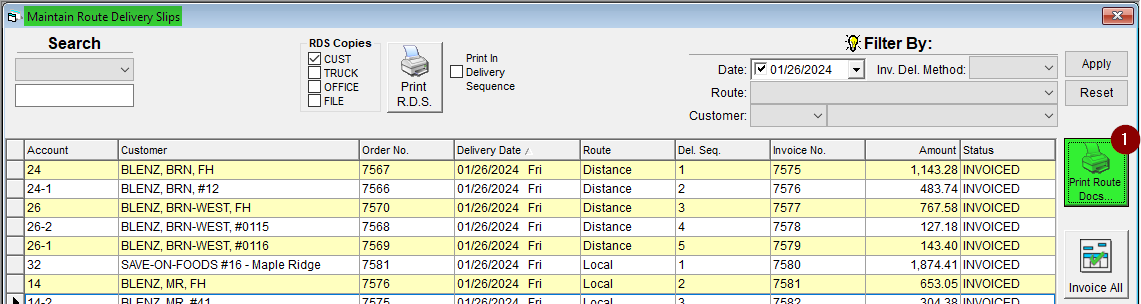
- As shown above, you can click into Print Route Docs in the top-right of each interface to access the Print Route Delivery Documents menu.
- As shown above, you can click into Print Route Docs in the top-right of each interface to access the Print Route Delivery Documents menu.
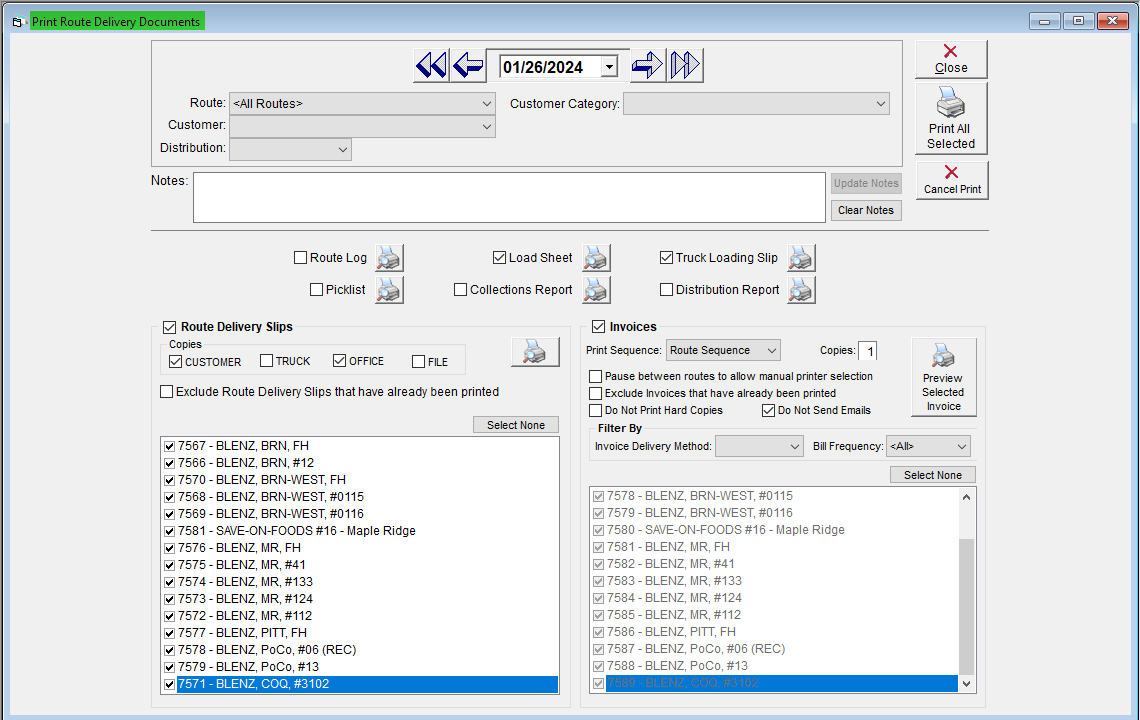
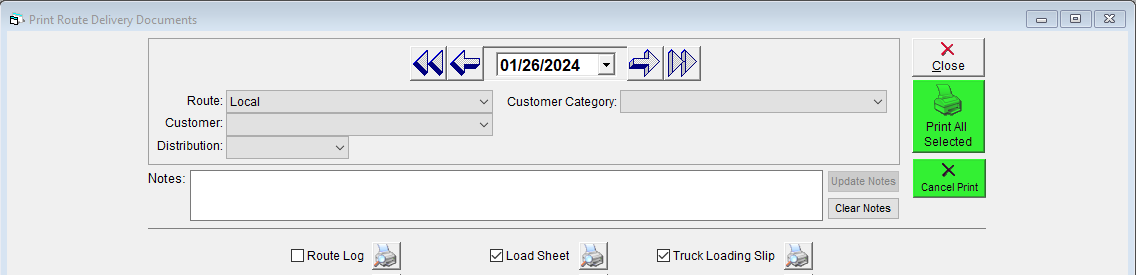
- Select the delivery date to print documentation for using the arrows at the top of the page, or the drop-down to select from the calendar.

- (Optional) Select a route from the Route drop-down menu. This will specify the information below to the specified route and allow you to preview Route Reports.

- The rest of the drop-downs in the header (Customer, Customer Category, Distribution) are filtering options. Select from these drop-downs to limit the Route Delivery Slips and Invoices included in the bulk print

- (Optional) Add special info in the Notes field, such as internal comments regarding that day’s deliveries. These notes will appear on the Route Log, ensure you press Update Notes before printing for changes to be reflected.

- In the middle section is a selection of reports. These can be previewed by hitting the Magnifying Glass-Printer Button to the right of the report name. Uncheck the checkbox to the left of the report name to exclude that report from the bulk print.
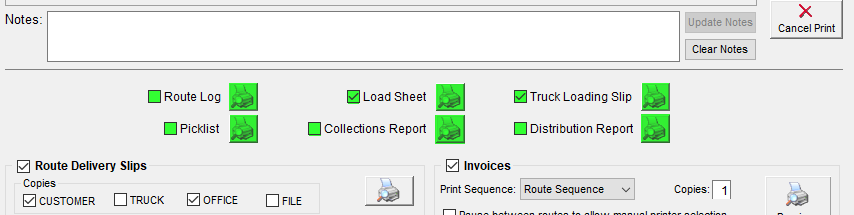
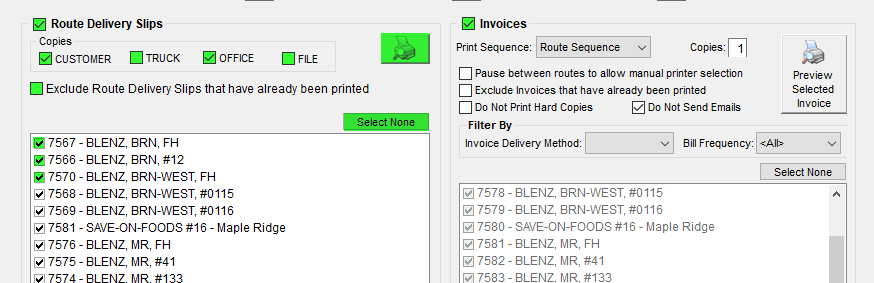
- At the bottom of the page are the Route Delivery Slip and Invoice sections. Much like the previous menu, you can simply uncheck the checkbox beside either of them to exclude printing them.
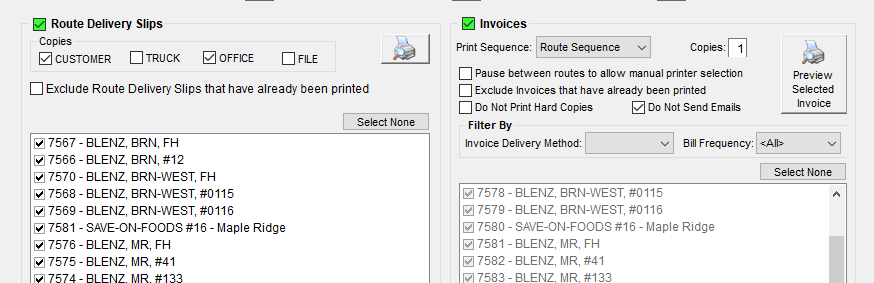
- In the Route Delivery Slips grid below, you can view all the customers present for the chosen day and route. Make sure the desired customers are selected here to ensure their place in the printing sequence. You can preview a Route Delivery Slip by highlighting one and clicking the Magnifying Glass-Printer Button in the top-right of the section.
- In the Invoice section, you can customize how your invoices are produced and sent away. FlexiBake defaults to printing invoices via the selected Route’s Sequence, but you can change this from the Print Sequence drop-down. Select Pause between routes to allow manual printer selection if you would like to change printers while printing multiple routes. Select Exclude Invoices that have already been printed to avoid double-printing your invoices.
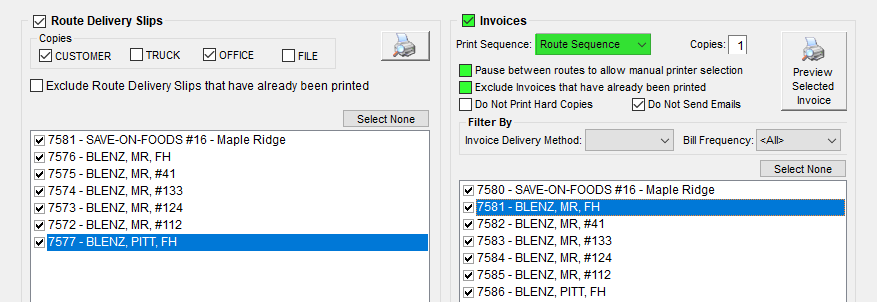
- You can choose to veto particular Invoice Delivery methods by selecting either Do Not Print Hard Copies or Do Not Send Emails. Invoice Delivery methods are defined on a per-customer basis in the Sales Centre, under Maintain Customers. More information may be found within Set Invoice and Statement Delivery Methods.

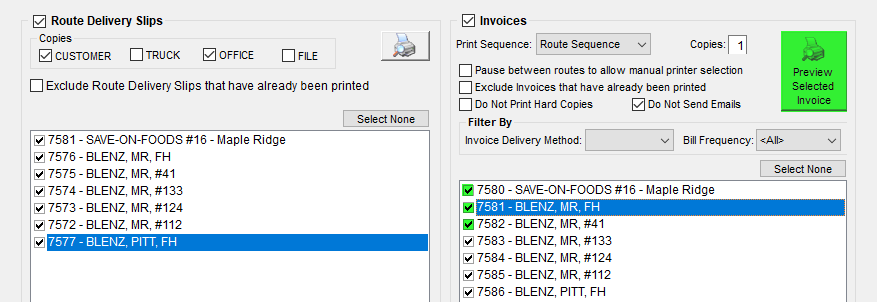
- Based on your filters, your invoices to print will be visible in the grid. Ensure the customers you intend to print for are selected to include them in the bulk print. You can preview an invoice by selecting one from the grid, then hitting the Preview Selected Invoice button.
- Once you’ve double checked your selections on the page, you can print all of your desired documentation in one go by clicking Print All Selected in the top-right corner of the page. You can cancel the printing process by clicking Cancel Print.
Your route documentation is now ready to use! If you haven't set up emailing through FlexiBake and would like to send Invoices by email please see our article SMTP Setup!