If you're using Xero as your accounting software, and you live in a region where you charge sales taxes, you'll need to set up your sales tax profiles in a specific format to match Xero's requirements.
Xero uses the location of your company to determine which tax accounts are necessary, and each of these accounts requires that the tax profiles used in FlexiBake have the correct code to import properly into Xero. This guide will outline how to create tax profiles in FlexiBake and the naming conventions required by Xero:
- Log into FlexiBake using the admin user, or a user that has admin privileges.
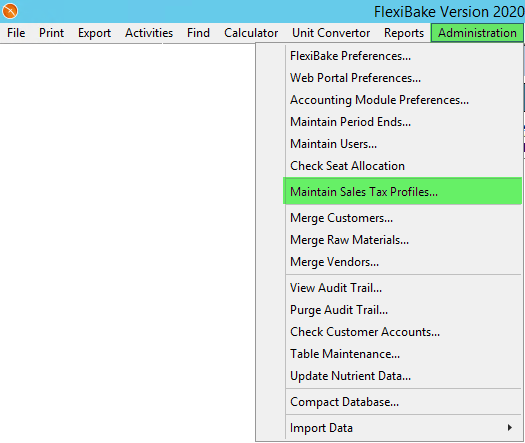
- In the upper menu bar, click on Administration and then select Maintain Sales Tax Profiles.
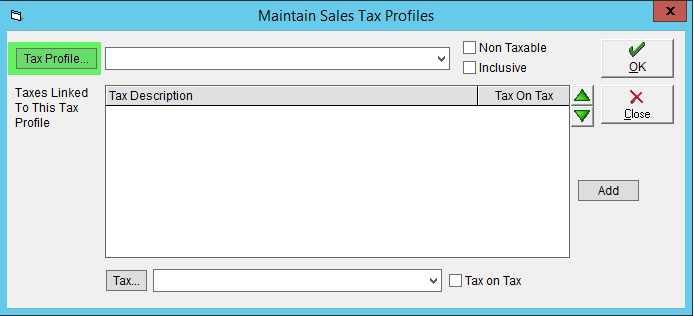
- This will open a pop-up. To add a new tax profile, click on the Tax Profiles box.
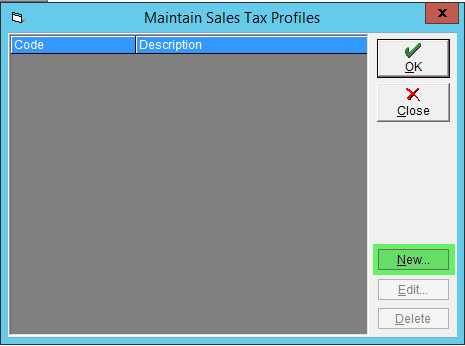
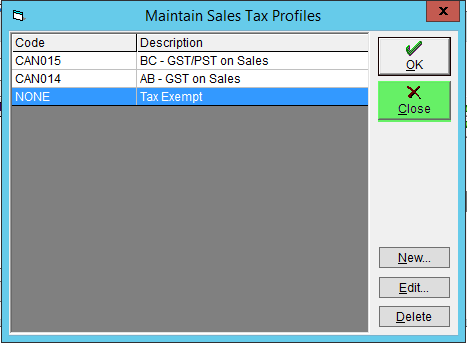
- At the bottom of the second pop-up, click on the New button.
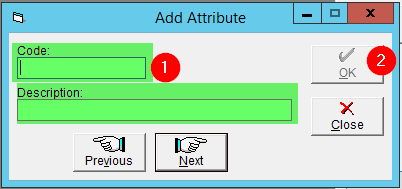
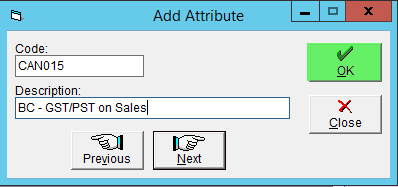
- Fill in the Code and Description fields. The Description can be what you'd like, but the code must match the requirement set out by Xero.
Some of the most common tax codes can be found below:
Canada
Code Tax Type CAN014 AB - GST on Sales CAN015 BC - GST/PST on Sales CAN016 MB - GST/RST on Sales CAN017 NB - HST on Sales CAN018 NL - HST on Sales CAN019 NS - HST on Sales CAN020 ON - HST on Sales CAN021 PE - HST on Sales CAN022 QC - GST/QST on Sales CAN023 SK - GST/PST on Sales CAN024 NT - GST on Sales CAN025 YT - GST on Sales CAN026 NU - GST on Sales NONE Tax Exempt OUTPUT Tax on Sales
United States
Code Description NONE Tax Exempt OUTPUT Tax on Sales
Australia
Code Name BASEXCLUDED BAS Excluded EXEMPTOUTPUT GST Free Income OUTPUT GST on Income
Didn't find what you're looking for? More countries' options can be found here. - Hit OK to save the tax profile. You can repeat the steps above as needed to cover all taxes required.
- Once all tax profiles have been entered, click Close to close the pop-up.
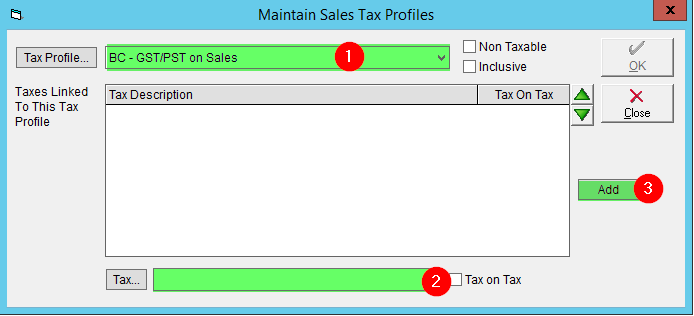
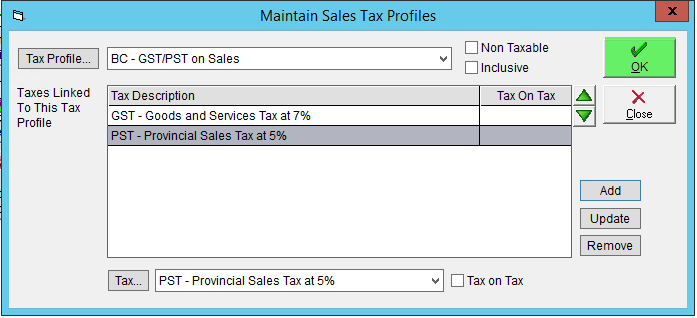
- Select the Tax Profile using the drop-down at the top. At the bottom of the screen, you can assign individual taxes to your Tax Profile by clicking the drop-down next to the Tax... button. Click Add to add your selected tax to your selected Tax Profile.
- Once all taxes required by the tax profile have been added, click OK to save your changes.
To learn more about how to specify individual Sales Taxes, visit our article on Setting Sales Taxes.
For taxes to appear on your invoices and sales order, you must assign your tax profile to products, sales orders, and/or customers. Tutorial articles for each of these in our associated articles Add a Tax Profile to a Product, Add Tax Profile to a Sales Order and Assign Tax Profiles to Customers.