If you are looking to import new pricing for your existing price tiers, or add all new price tiers to your FlexiBake system, then making use of the Price Tier import function can save you time, and energy.
Note: In order to import a price tier you will need a csv file set up according to the attached template in an accessible folder, and an import template (which will be the first step of this article).
Step 1: Building the Import Template
- Navigate to the Activities drop down, then Import, Maintain Import Templates.
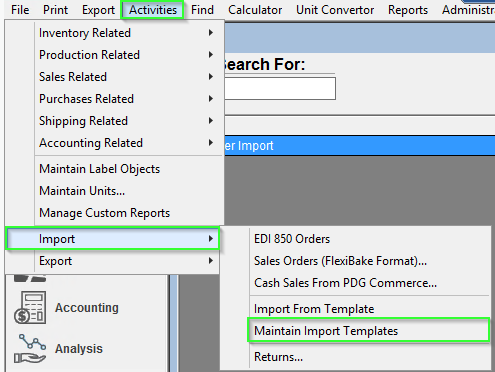
- Click New... in the bottom left to begin creating a new import template.

- Give your order template a name, and fill in the following fields:
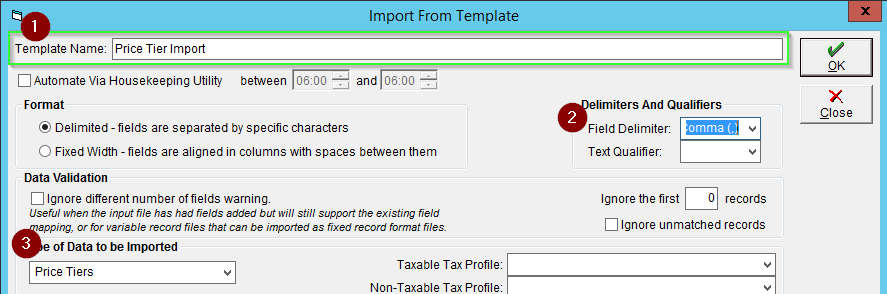
- Field Delimiter = comma (" , ")
- Type of Data to be imported = Price Tier
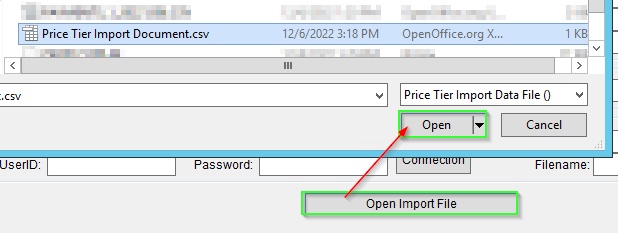
- After you have filled in the above, select the price tier import file by clicking Open Import File and locate it in its accessible folder.

- Once you have located the file, select it then click open or double click it.
- The bottom grid should now be populated with the headings from your import document on the left hand side.
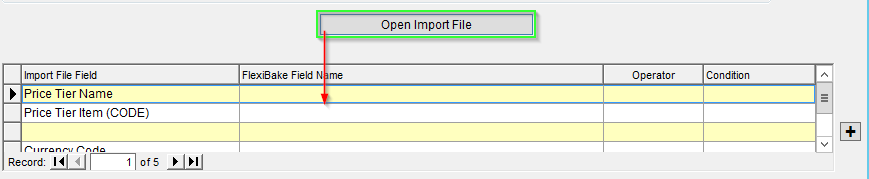
- In line with the headings, using the drop downs select the appropriate data mapping options as shown below:

It is important to note that the Price Tier Item field is looking for the CODE or SKU of a product, not the name or description. - Click OK to save the Import. The Import Setup should match the steps above.

Your import template for price tiers is now successfully configured, and you are ready to import your price tiers into FlexiBake. For your initial imports, we strongly recommend auditing the imported data to confirm that everything has transferred and is flowing correctly.
Step 2: Utilizing the Price Tier Import
If you are going to be importing a brand new price tier, you will need to create the price tier - giving it a name before you can import data to it.
To do this first check the name on the import document and copy it, then go to the Analysis Center, Maintain product Prices, then click the New Price Tier button in the top left.
Then, in the pop up click New... and create a price tier with the name matching your import document. If you require more guidance on this piece, this article outlines the full process of price tier creation and assigning: Creating Price Tiers.
Now that you have created the import template and matched your price tier names to your document, you are ready to begin importing.
Follow the steps below to perform the Price Tier Import. It is recommended to perform this first on the copy as mentioned earlier. You can confirm you are not on your default database by viewing the open windows square on the left hand side - if it is grey you are on the live database, if it is orange you are on a copy or non-default datafile.
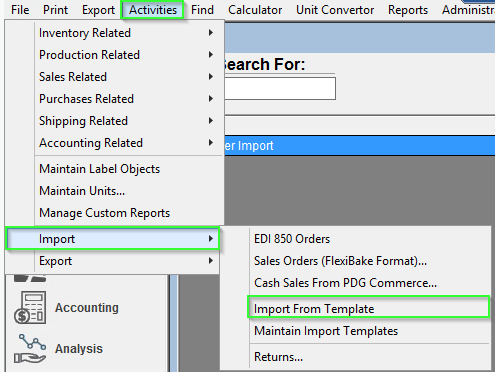
- Navigate to the Activities drop down, Import, Import from Template.
- Select the Price Tier import template you created in part 1 from the drop down.
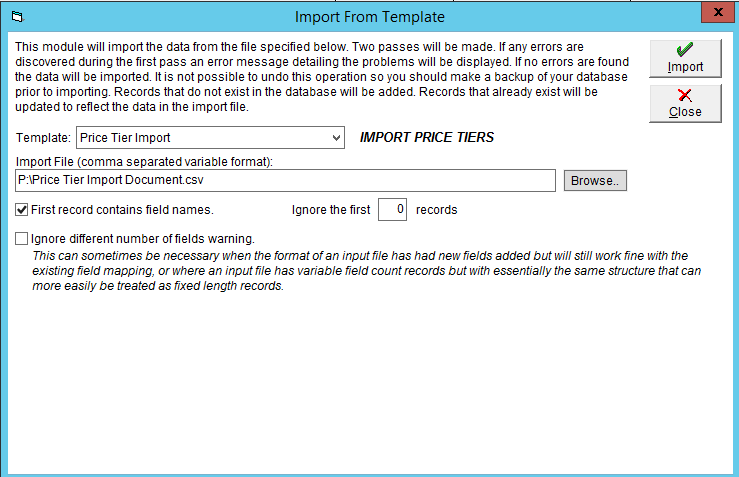
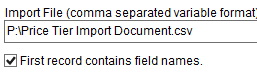
- Click Browse then locate your import document in its accessible folder.

- Ensure the First record contains field names check box is checked.
- Click the Import button and let it run its course.

Once the import has completed, we recommend going and viewing a couple of the imported items in the maintain product prices (in Analysis Center) and insuring your customers are on the correct price tiers, especially if you have added a new price tier here. To assign customers to there price tier you can follow the guide found here: Assigning a Customer to a Price Tier.