If you or your accountant are using a software that is not included on our list of specific accounting exports, don't worry that your data is trapped! instead, you can export your invoice, payment and credit note data to a widely accepted Comma Separated Variable (CSV) file which can often be imported directly into your accounting software.
In this article, we'll cover how to set up your accounting module preferences, available exporting options and the export process.
Setting Up Your Accounting Module Preferences
Before you can begin this step, please ensure that your GL accounts have been entered into FlexiBake, and that the GL information entered matches your accounting system exactly for a successful import. A tutorial on how to enter your GL accounts can be found in our article Add GL Accounts.
Before exporting, you'll need to tell the program where you want everything to go. This is done by setting up your accounting module preferences. This section handles setting the default accounts for various transaction types, however you can also assign specific products, product categories, and payment types to non-default GL accounts as well. The tutorials Assign GL Codes to Products, Assign GL Codes to Product Categories, and Assign GL Codes to Payment Types, respectively, cover the steps required to set this up should you desire to do so.
To set up your accounting module preferences for a CSV export:
- Log into FlexiBake as the Admin user, or as a user with administrator privileges.
- In the upper Menu Bar, click on Administration and then select Accounting Module Preferences.
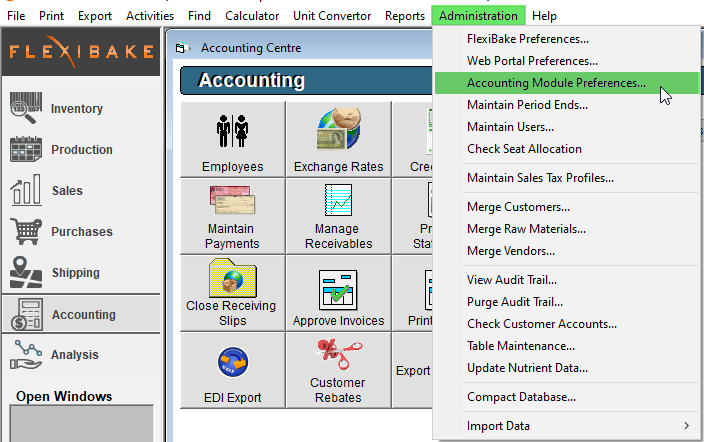
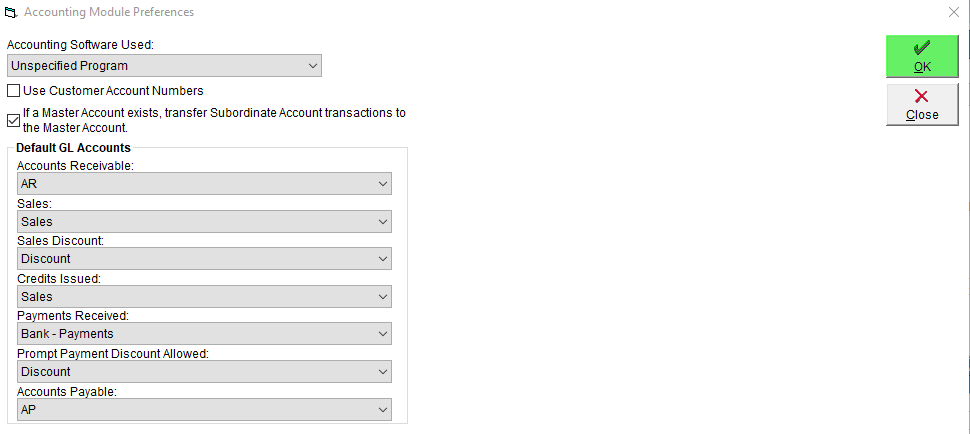
- From the Accounting Software Used drop-down, select Unspecified Program.
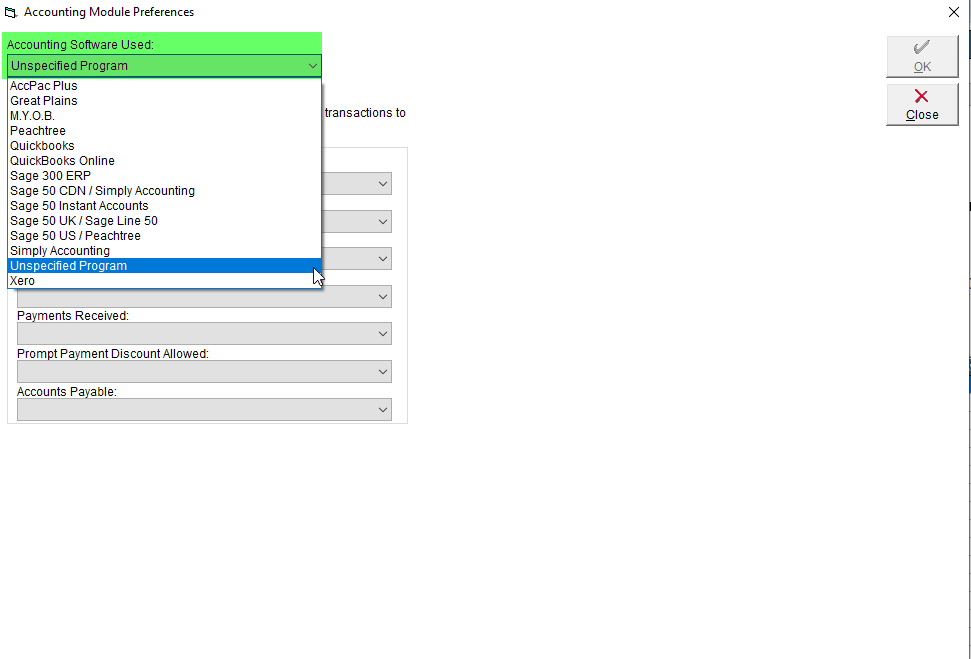
- If you are selecting a different Module, or setting it up for the first time, you will be directed to enter GL Accounts, instructions may be found here
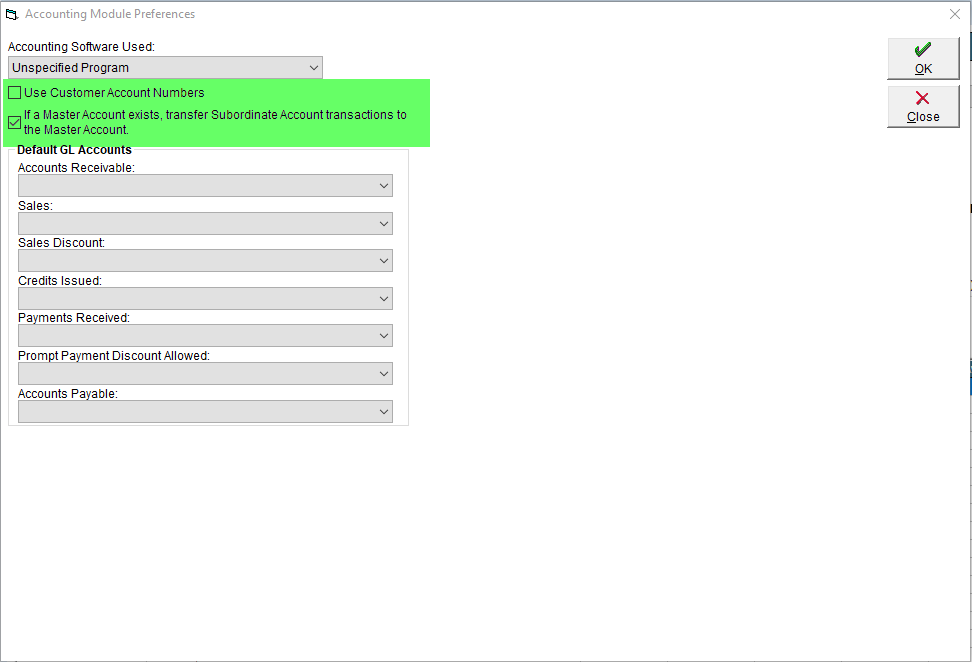
- There are 2 checkboxes corresponding to optional export settings, you may enable these to your preference:
- Use Customer Account Numbers - Transactions will be exported under the customer's account number instead of their name. This information must match the information in for a successful import. You can learn how to change your FlexiBake customer account numbers in this tutorial: Update Customer Account Number.
- If a Master Account exists, transfer Subordinate Account transactions to the Master Account - Any invoices, credits and payments under the subordinate account will be exported under the Master Account's name. This allows you to only have the Master Account in your accounting software. More info on Master accounts in FlexiBake is available here: Set Customer as a Master Account.
- In the Default GL Accounts section, use the drop-downs to select to select which GL account each transaction type will be attributed to. To help avoid errors, the drop-down will only display GL accounts of an appropriate type for the transaction.
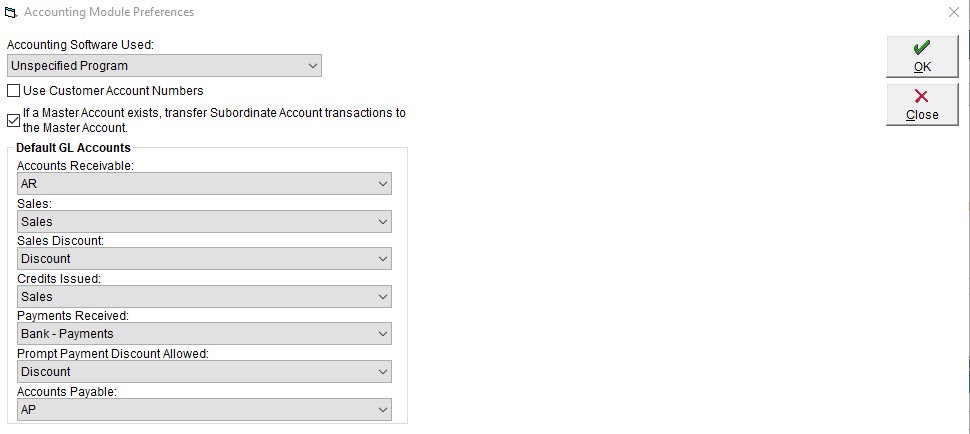
- Once complete, click OK to save and apply your changes.
Now that the setup part of the process is complete, you're ready to export!
Exporting Your Data
Exporting can be done whenever is convenient for you, be that every day or every week, however we do recommend doing it regularly.
When you're ready to export, simply follow these steps:
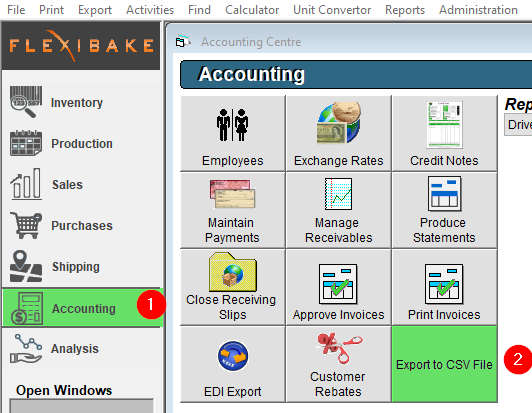
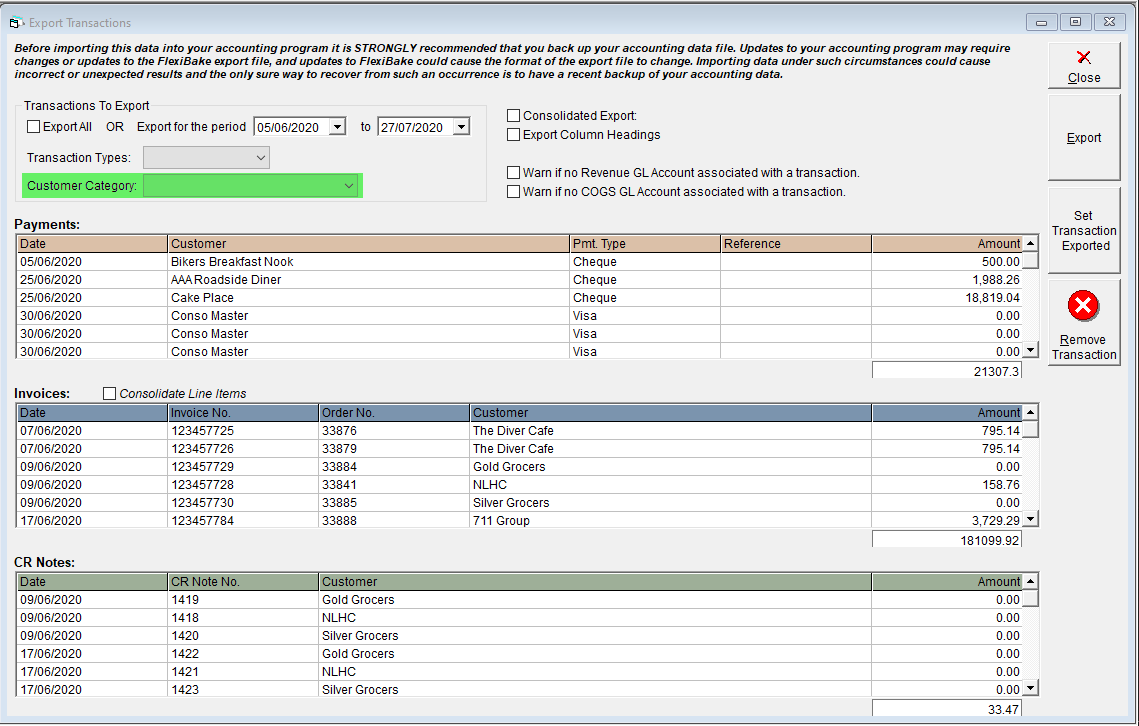
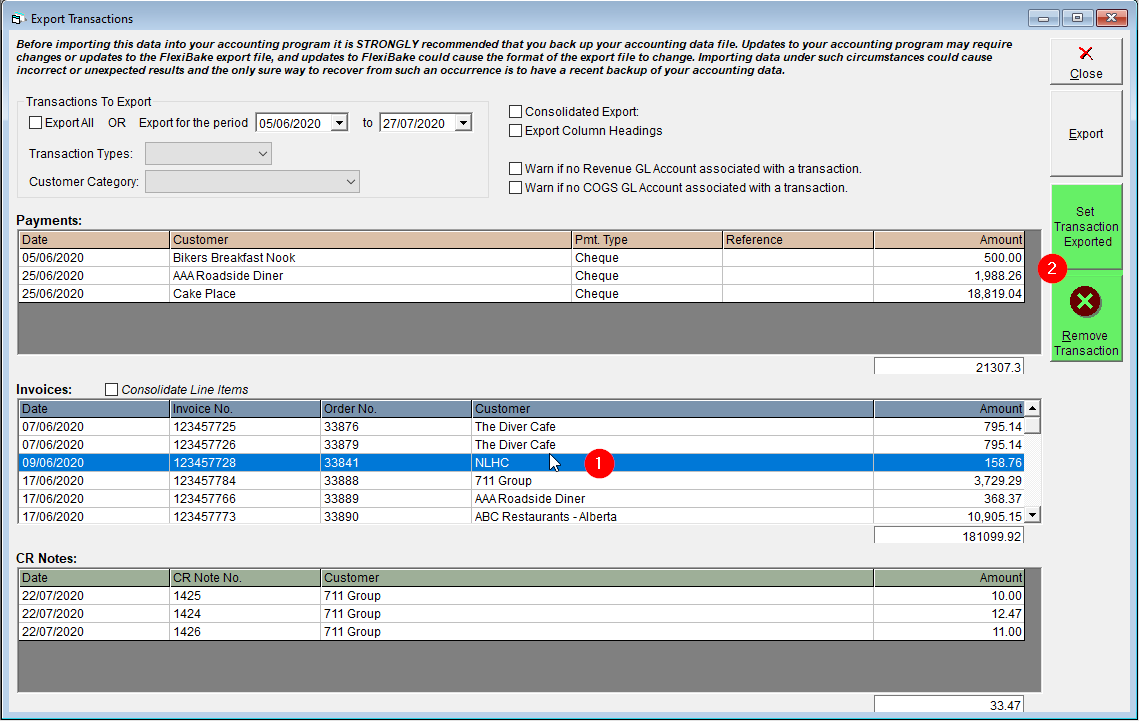
- Navigate to the Accounting Centre, and click on Export to CSV.
- Configure your export to your preferences:
- Use the Export All checkbox to export any transactions not yet marked as exported, or uncheck this box and select dates instead to only export transactions made within the specified period.
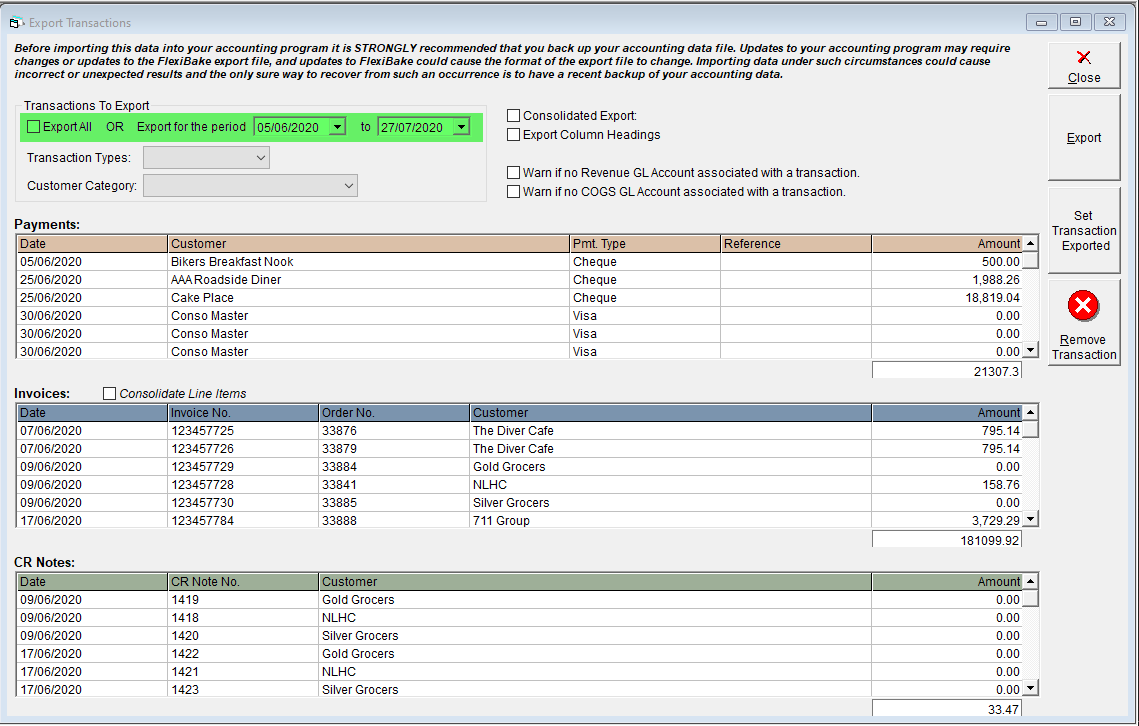
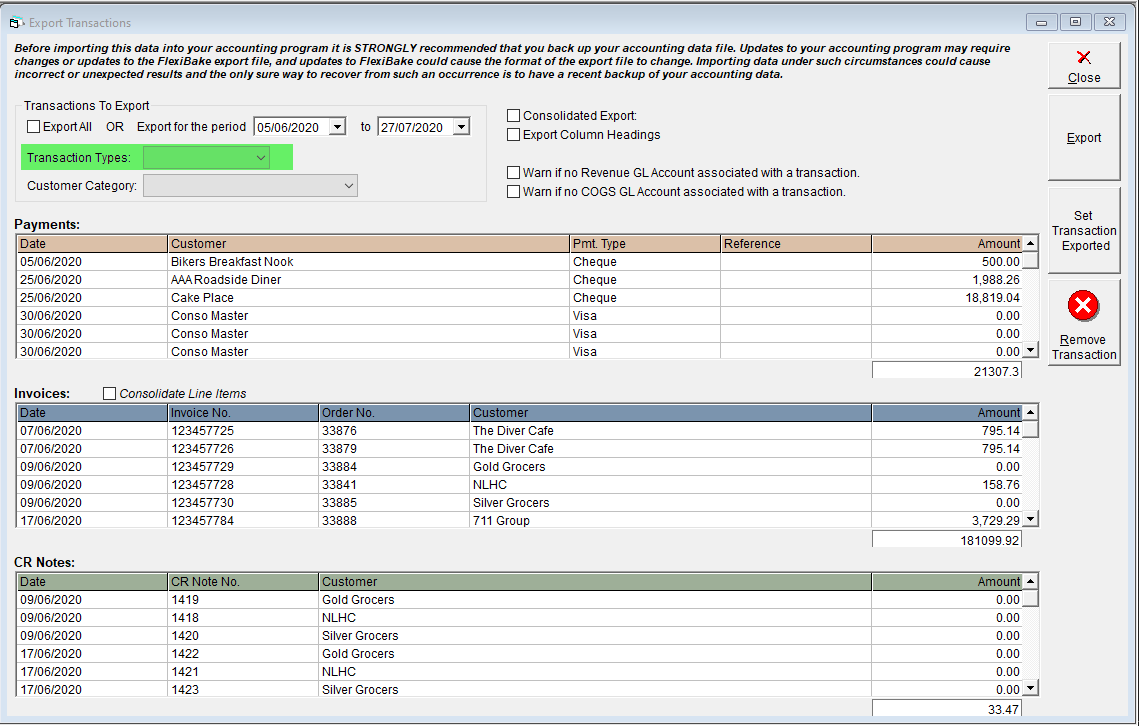
- Use the Transaction Types drop-down to limit what's exported. The options available to a CSV export are Credit Notes, Invoices, Payments, or All.
- Use the Customer Category drop-down to limit the export to a certain group of customers only.
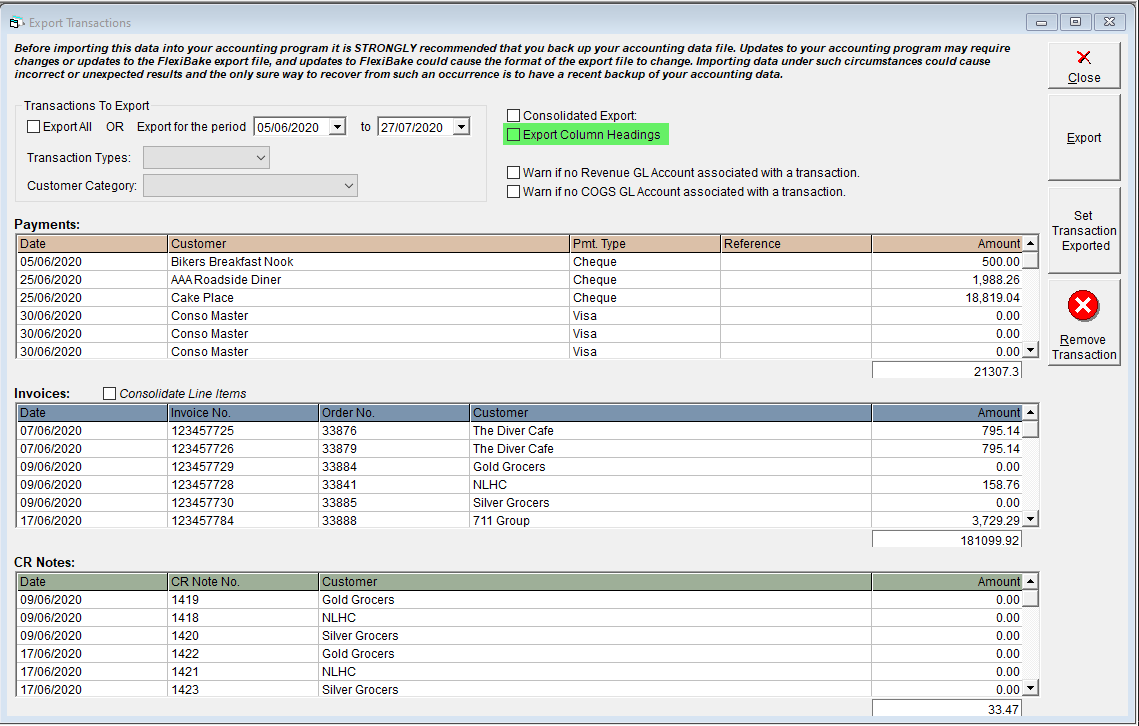
- Use the Export Column Headings checkbox if you would like the first line of your export to indicate what data is stored in that column.
- Select the level of detail you want in your export.
The highest level of detail is the default setting. Your export will contain information on the individual line items (products) for each invoice, including product names/numbers and prices. This can make for a large export if you handle a large number of invoices, or process large orders.
For a medium level of detail, you can select the Consolidate Line Items box above the Invoices grid. When this is selected, Invoices will be listed in the export as their individual numbers, but will not contain any detail in regards to the products on the invoice, instead only the invoice total will be displayed.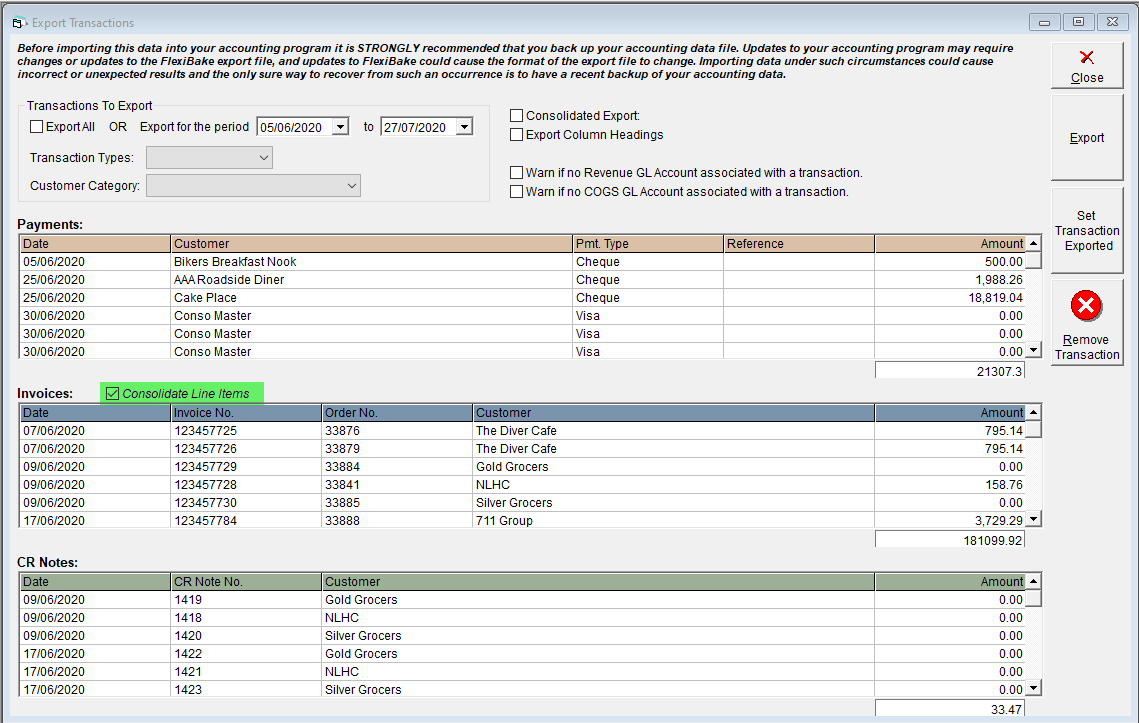
For the lowest amount of detail, check the Consolidated Export button. This will change the view of the screen to display the total Credit and Debit amounts for each GL account in the given period or as the total of the unexported transactions. Please note that this is not compatible with selecting a specific transaction type. If you select this option, you can now skip to step 4.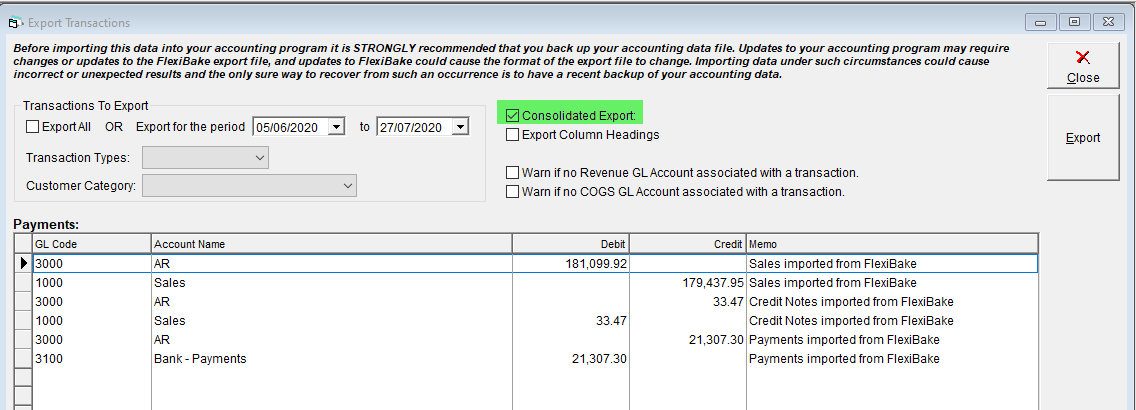
- Use the Export All checkbox to export any transactions not yet marked as exported, or uncheck this box and select dates instead to only export transactions made within the specified period.
- If you have transactions listed in the grid that you do not want to export, click on them once to highlight and then click on either Remove Transaction or Set Transaction as Exported.
- Use the Remove Transaction button if you do not want to export at this time, but may want to later.
- Use the Set Transaction as Exported button if the transaction has already been entered into your accounting software and you do not want to duplicate it. Transactions that have been marked as 'Exported' will not be able to be edited, nor are they available to be exported again.
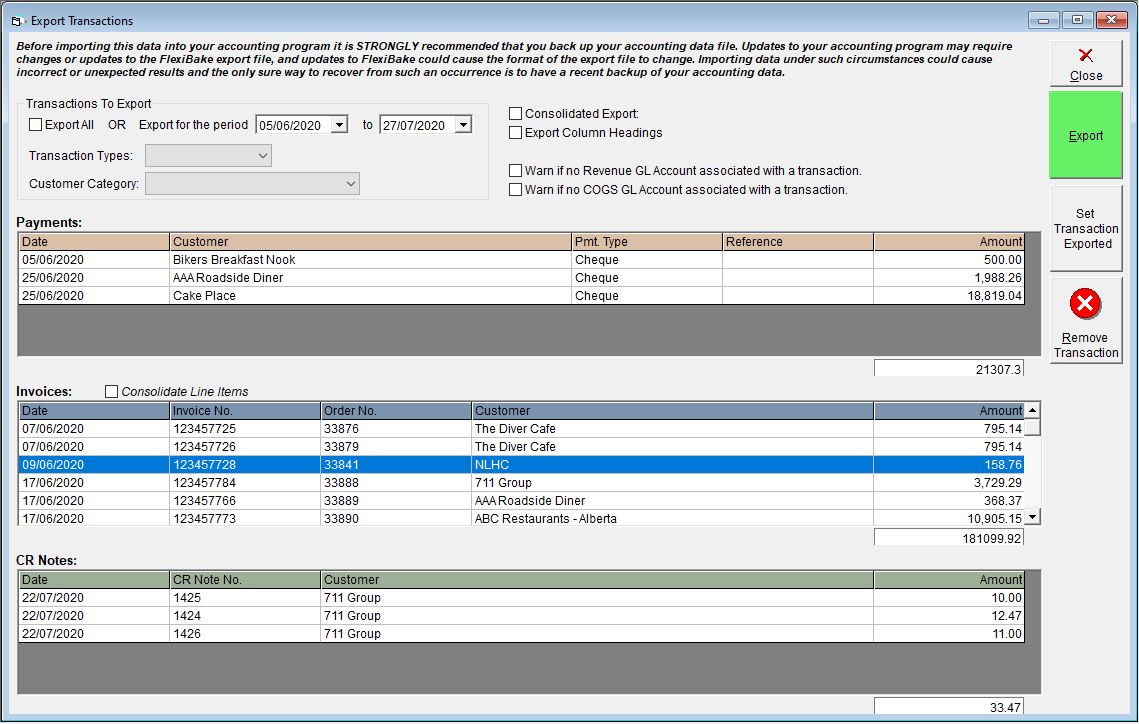
- Once you are satisfied with your export, click on the Export button, and select where you would like the export files to be saved.
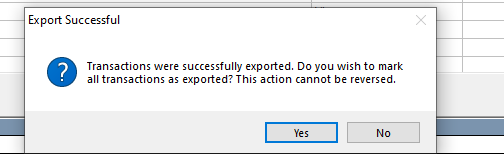
- Once the export files have been generated, a pop-up will appear in FlexiBake asking if you would like those transactions to be marked as 'Exported'. If you select Yes, you will not be able to edit those transactions, and you cannot export them again at a later date. If you select No, the transactions will behave as before, making this a good option to choose if you're unfamiliar with exporting, or if you're trying out some new settings.
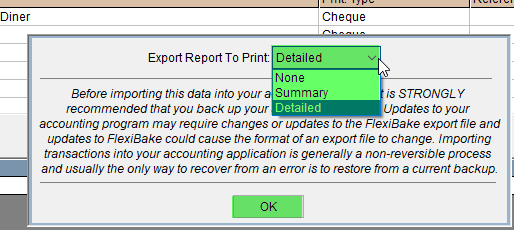
- Finally, you'll be presented with a pop-up message where you can select an export report to print. Selecting Detailed will produce a report listing all transactions exported, alongside their amounts and dates. Selecting Summary will produce a report displaying the total amount exported for each transaction type, and selecting None will not produce a report.
You're now ready to import into your accounting software!